📄 Summary: What You’ll Learn in This Article
This article explains what GraphQL is, how to connect to it, and how to run your first queries. We’ll start simple, so you understand the basics, and then guide you step by step through authentication, writing queries, and filtering data. By the end, you’ll know how to retrieve and structure data efficiently and be ready for more advanced use cases.
-
Understand GraphQL in simple terms
-
Check if GraphQL is enabled in your system
-
Authenticate with OAuth2 and access tokens
-
Use Nitro or Banana Cake Pop (UI tools) for queries
-
Build queries to fetch and filter data
-
Explore related objects with nested fields
🧑🤝🧑 Who Should Read This?
This article is most useful for:
-
Anyone new to GraphQL who wants to understand how to access and query data in Marmind using the GraphQL API.
✔️ Prerequisites: What Should You Know Before Getting Started?
Level: Advanced
Access required: Admin access to the environment and GraphQL credentials
-
Basic understanding of data structures is helpful
What GraphQL Can Do
The Marmind API is based on the GraphQL standard and provides comprehensive access to a wide range of business objects used in Marmind.
Think of GraphQL as a data menu. Instead of being forced to order a fixed meal (like with REST APIs), you can choose exactly what you want on your plate.
For example, if you only need the campaign name and ID, you don’t have to fetch all campaign details. GraphQL lets you ask for only the fields you want, which makes it faster and cleaner.
A basic query looks like this:
query {
  initiatives(first: 10) {
    nodes {
      id
      name
    }
  }
}
This will return the first 10 campaigns (called initiatives) with only their IDs and names. That’s the power of GraphQL: you’re in control of the data depth and shape.
Step-by-Step Guide
1. Verify GraphQL Availability
-
GraphQL is available on most new Marmind systems where it has been enabled.
-
Open your browser and try the URL:
https://<your-instance>>.marmind.com/graphql/api/ui/
-
Some systems may use
/graphql/api. Try both if unsure. -
If enabled, you’ll see a sandbox interface called Nitro or connect via Banana Cake Pop, another supported client.
-
Click on “Create Document”
-
In “General”, add the HHTP Endpoint. For this, enter the URL:
https://<your-instance>.marmind.com/graphql/api/ui/
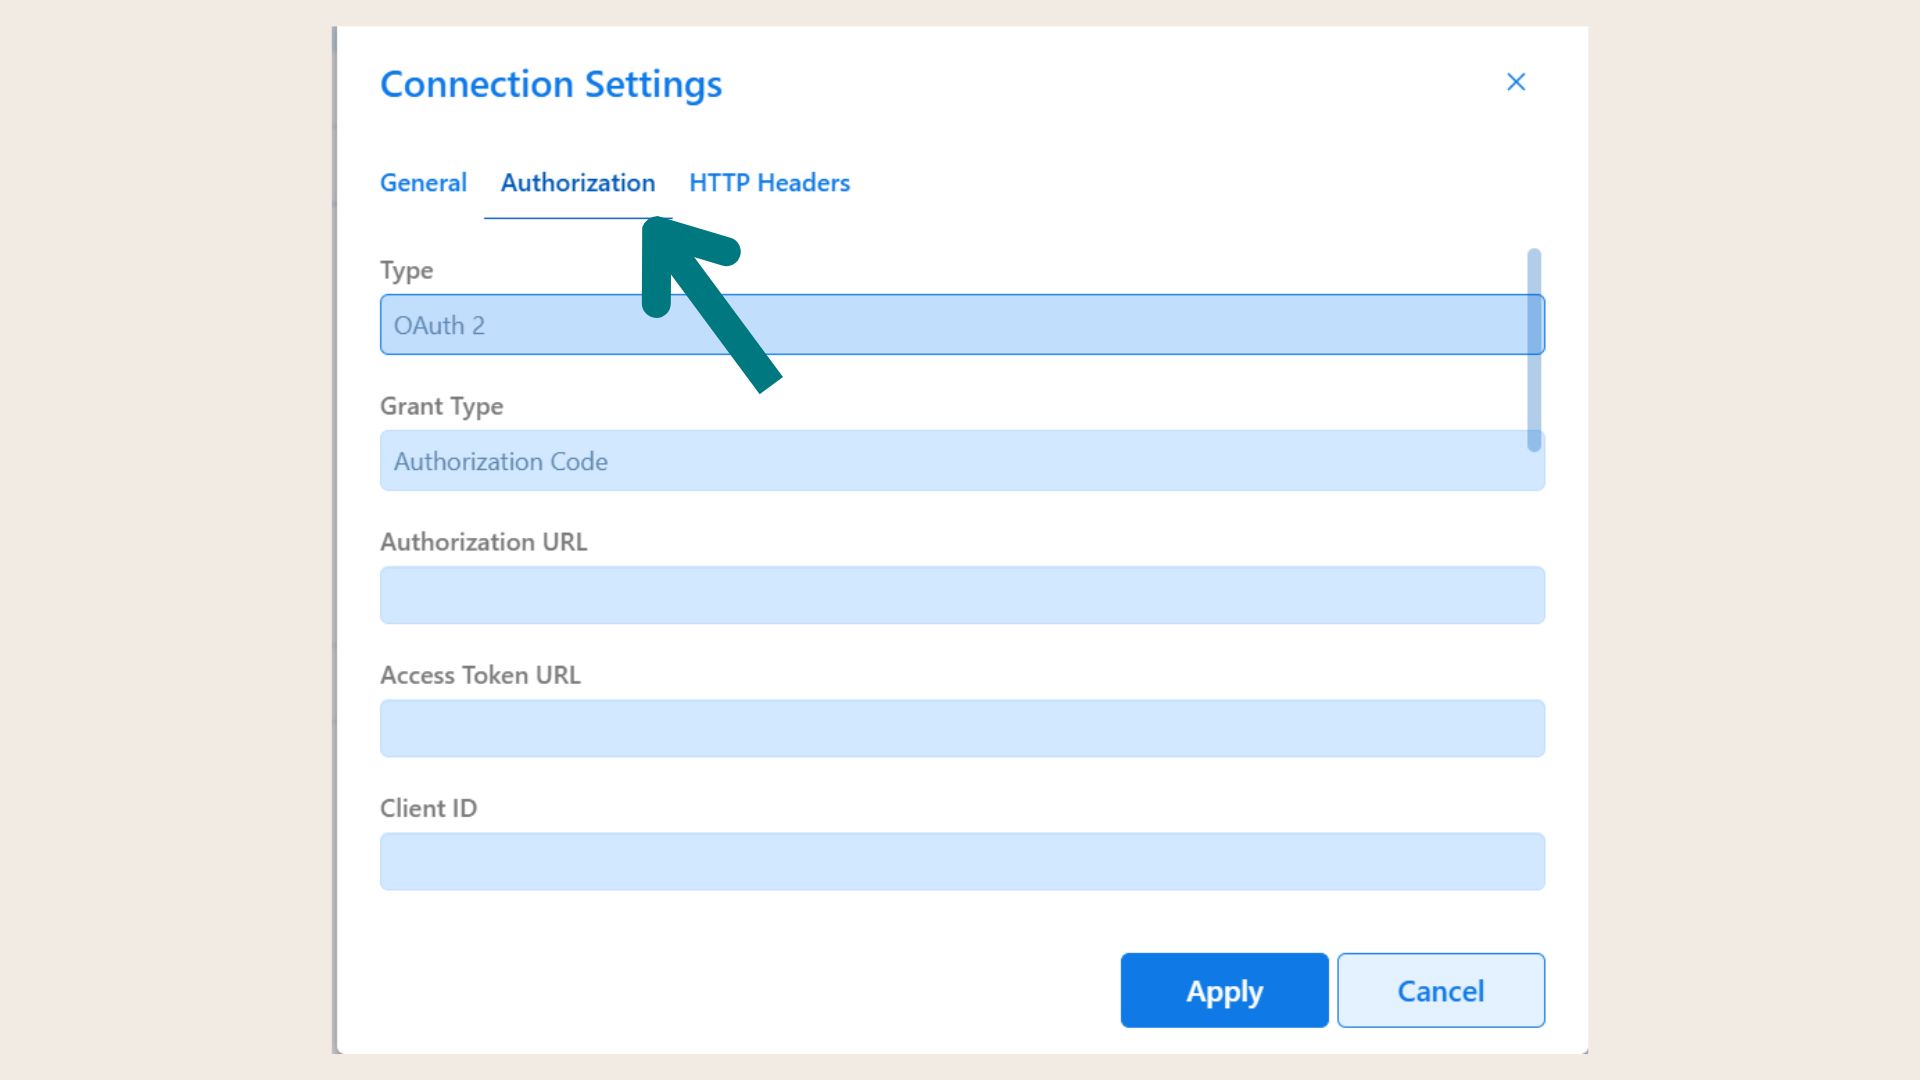
2. Authenticate with OAuth2
To run queries, you must log in with OAuth2 Client Credentials.
-
Go to Settings > Authorization.
-
Select OAuth2 and choose Client Credentials.
-
Enter:
-
Access Token URL: <https://<your-instance>>.marmind.com/graphql/oauth2/token
-
Client ID and Client Secret (found in LastPass or provided by admin).
-
Scope:
-
api→ the base scope every user needs -
read→ for reading data -
write→ for creating/updating data -
budget→ for budget and cost queries (this scope is only available for clients with the budget feature activated)
(Tip: include all three to avoid missing data later.)
-
-
-
Click Fetch Token. If successful, you’ll receive an access token.
-
Apply it, reload your page once, and the schema explorer should now be active.
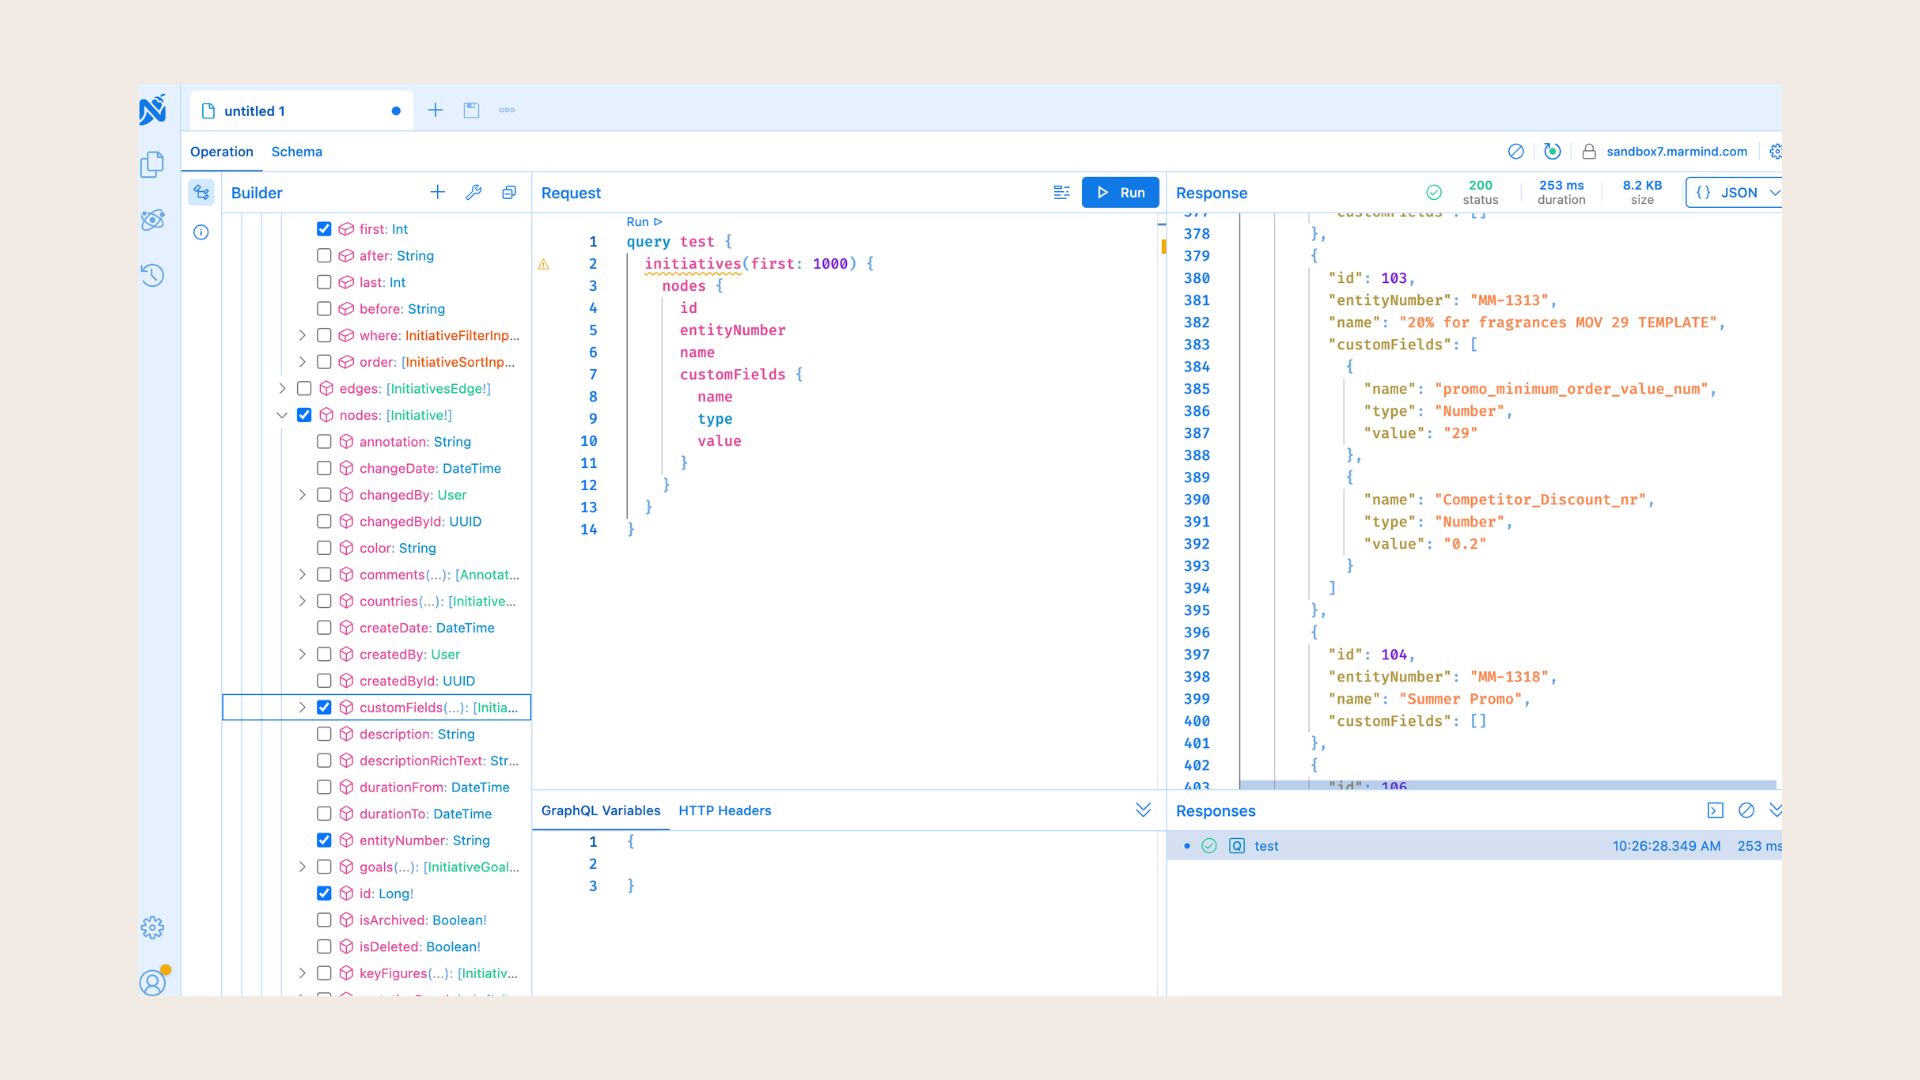
3. Run Your First Query
-
Start with your request in the request field.
-
Always start with
query { ... }. -
Example: Fetch the first 10 Advertisings with their names:
-
query { advertisings(first: 10) { nodes { name } } } -
Use the left-hand Schema explorer/Builder to discover available objects and fields. No need to memorize everything.
-
Note: The Schema explorer/Builder will only be active once you have given your query a name.
4. Filter and Sort Data
-
Use
whereto filter. Example: only Advertisings under a specific path:
query {
  advertisings(
    first: 100
    where: { path: { startsWith: "/root/brand-campaigns" } }
  ) {
    nodes {
      name
      customFields {
        name
        value
      }
    }
  }
}
-
Add sorting with
order:
query {
  initiatives(
    first: 10
    order: { creationDate: DESC }
  ) {
    nodes {
      id
      name
      creationDate
    }
  }
}
5. Explore Nested Objects
-
GraphQL lets you drill into related data:
query {
  initiatives(first: 5) {
    nodes {
      name
      creationDate
      responsiblePerson {
        email
      }
    }
  }
}
Here, we’re not just fetching initiatives, but also the responsible person’s email.
6. Beyond Queries: Mutations
Queries read data. Mutations write data.
Example: create a new To Do:
mutation {
  createToDo(
    input: { name: "Test Task", parentId: "initiative:42185" }
  ) {
    id
    name
  }
}
Mutations follow the same principle: you decide what fields you want returned after the change.
❓ FAQs