📄 Summary: What You’ll Learn in This Article
This article explains how super-administrators can delete users in Marmind.
-
Step-by-Step guide on how to delete users
🧑🤝🧑 Who Should Read This?
This article is most useful for:
-
Admins or Super Admins who are in charge of administering the user list of their company.
✔️ Prerequisites: What Should You Know Before Getting Started?
Level: Intermediate
Access required: Super-Admin rights
-
Basic understanding of user permissions within the navigation tree is required.
Important Prerequisite for Deleting Users
Before removing a user from Marmind, please follow these steps to avoid issues:
-
Mandatory: Remove the user from all teams.
If you try to delete a user who is still assigned to a team, Marmind will display an error message and the deletion will fail. -
Recommended: Reassign any open To Dos.
While not required, we strongly recommend reassigning the user’s To Dos before deletion. If you don’t, the user name will be pseudonymized in the task assignment. -
Recommended: Reassign any responsibilities.
Similarly, reassigning responsibilities is not mandatory, but highly advised. Otherwise, the user’s name will be pseudonymized wherever they were responsible.
It must be ensured that when reassigning To-Dos or responsibilities, the receiving user has at least the same (or higher) rights to the same objects. For example, To-Dos of an administrator cannot be transferred to a guest user.
Step-by-Step: Delete a New User
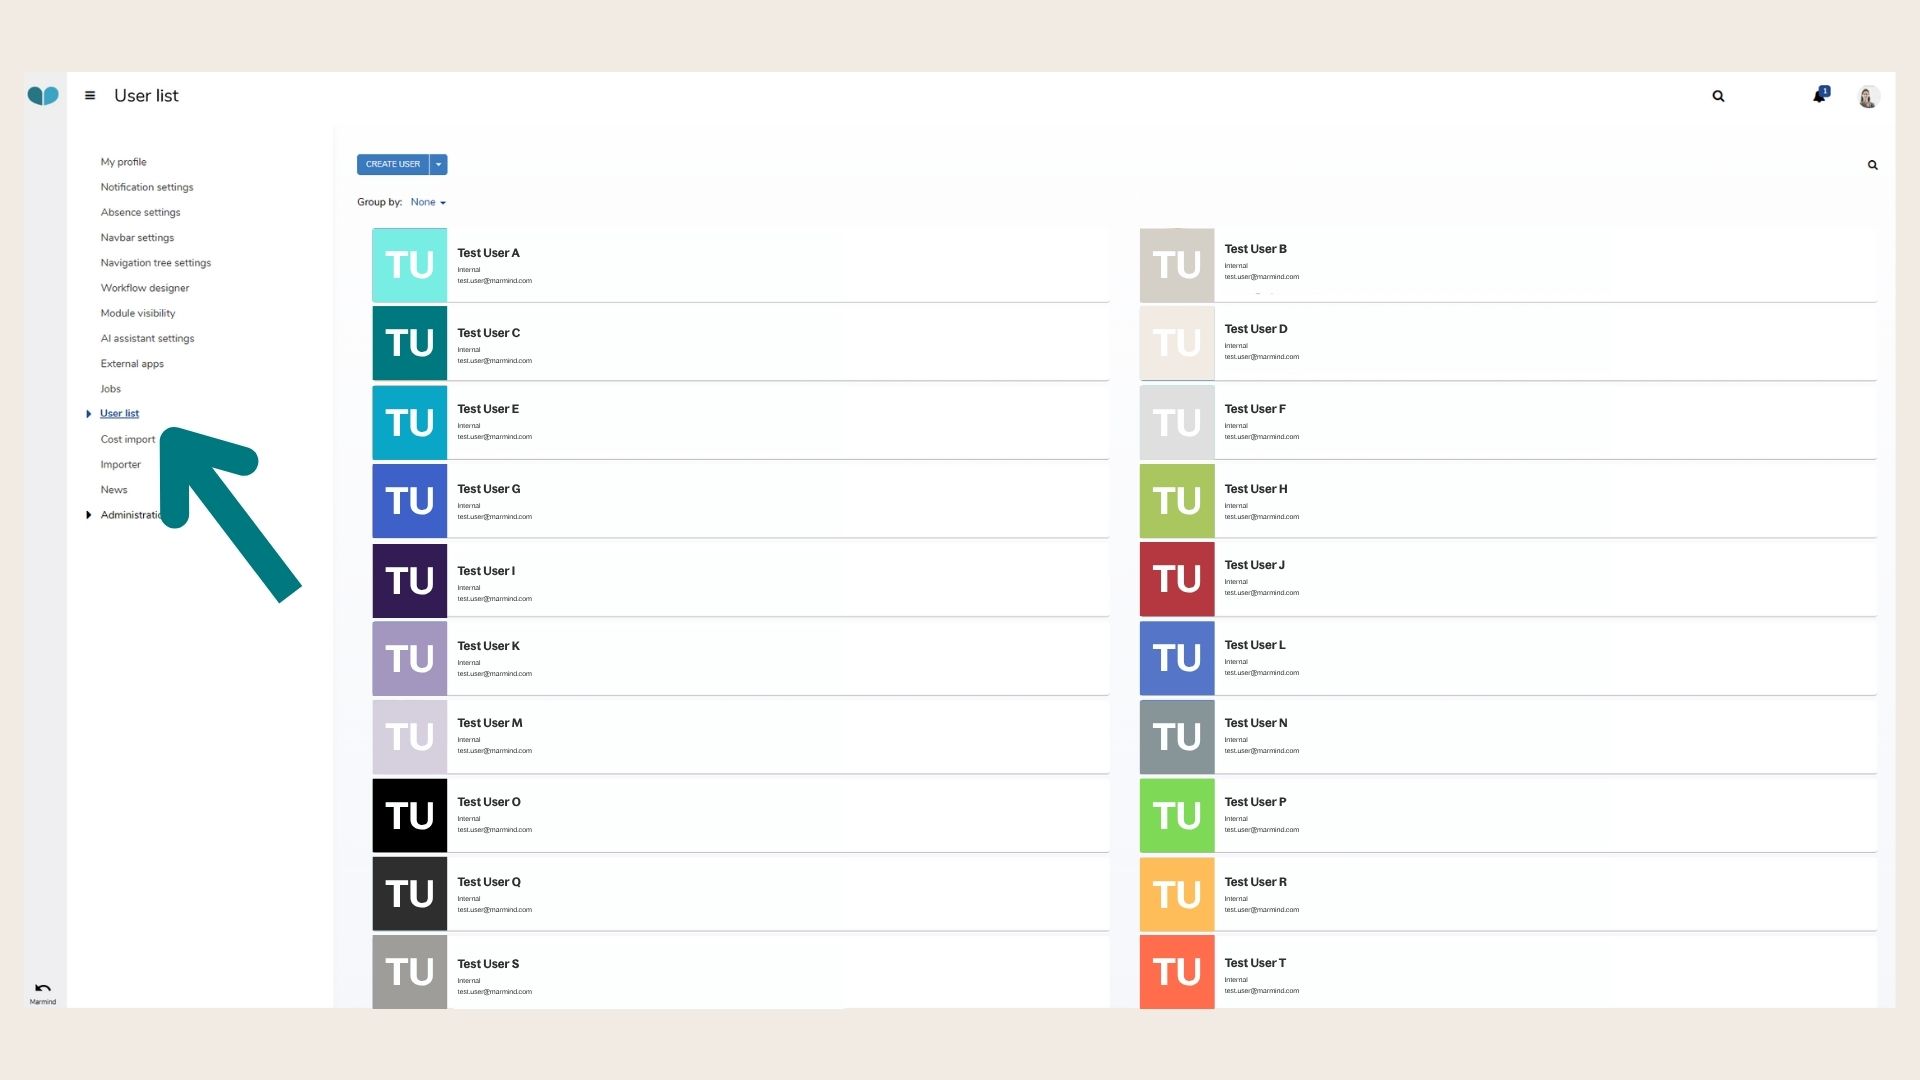
Step 1: Navigate to the User list
The User list is visible in the Settings.
Only Admins or Super-Admins have access to the Marmind Settings.
Step 2: Check Existing Permissions
Click on the desired user name. A pop up window will open. Click on the blue “Team overview” button on the bottom left:
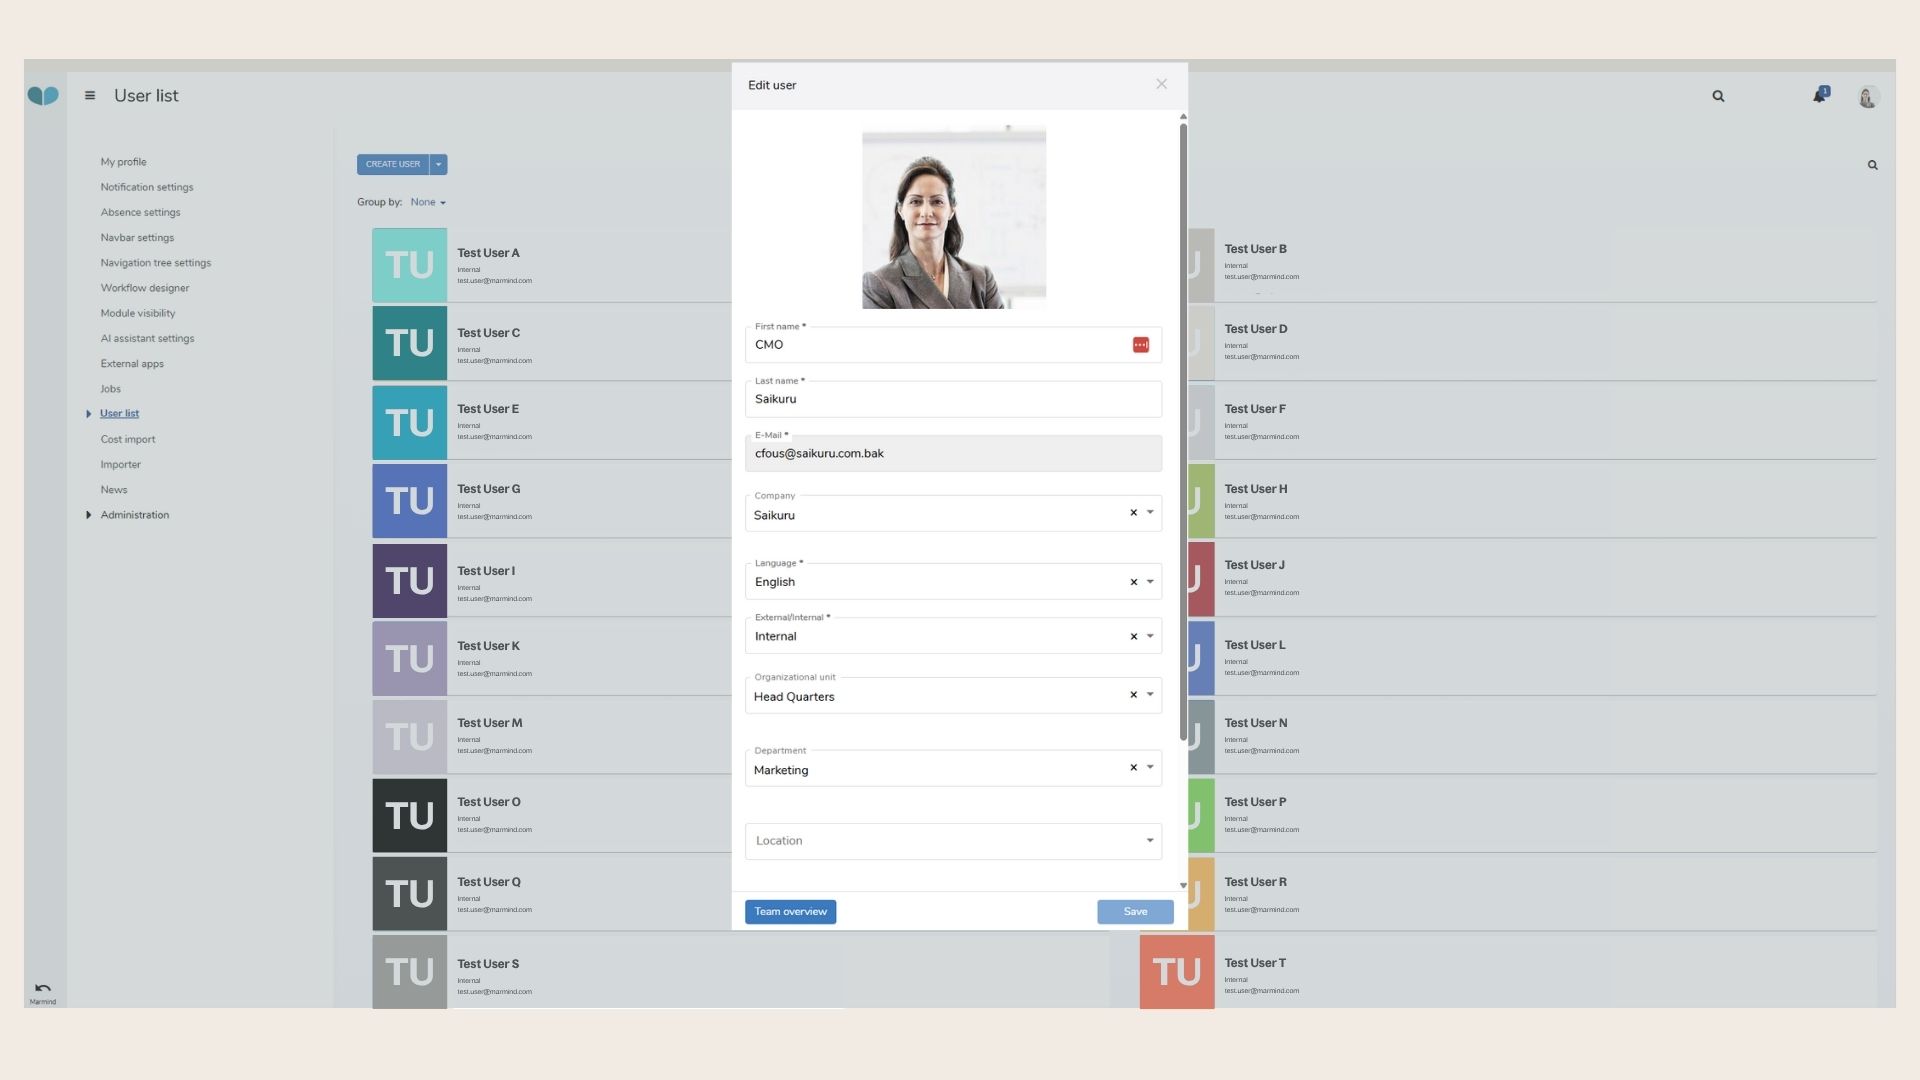
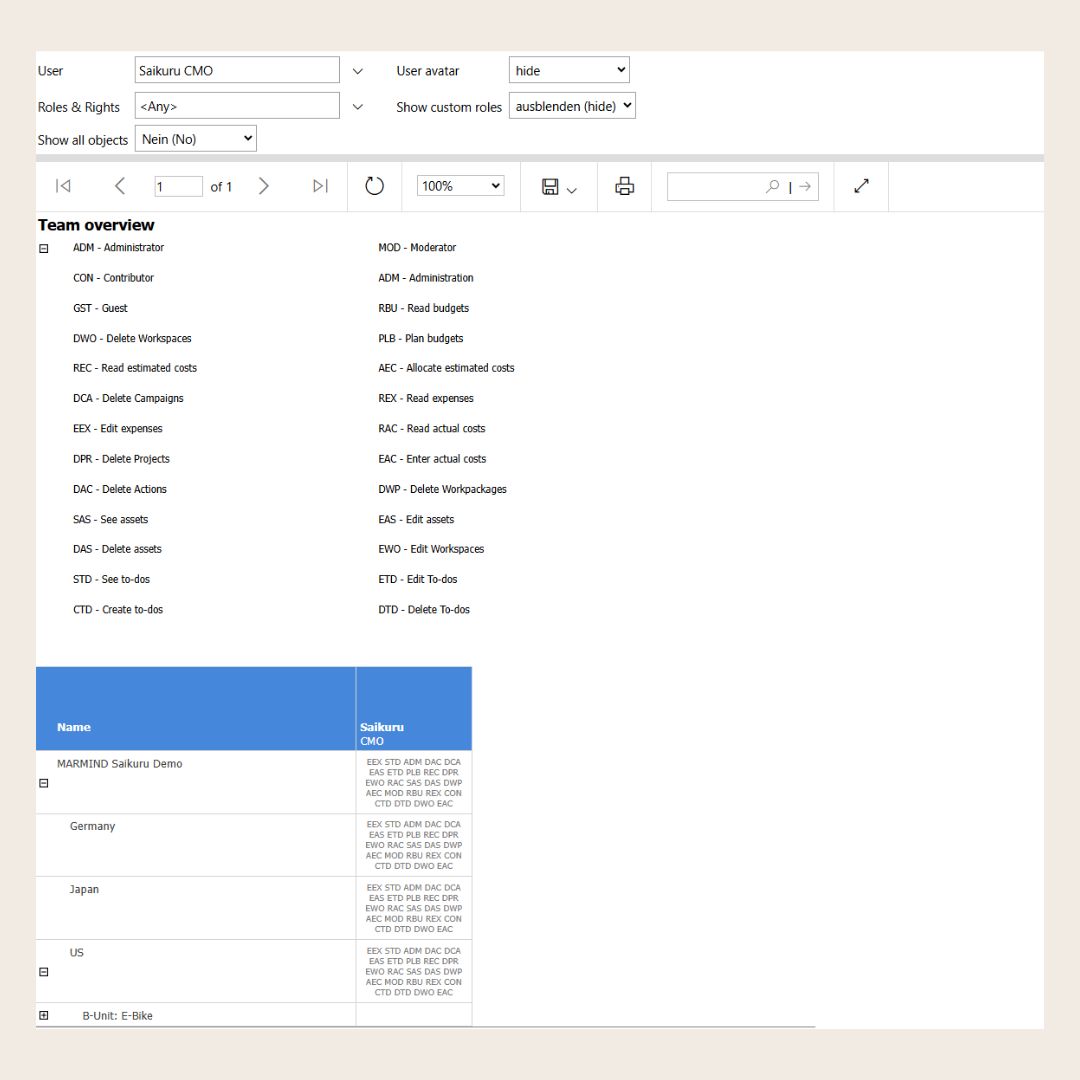
A permission report will open in a new tab. This report shows you the rights and permissions of this user.
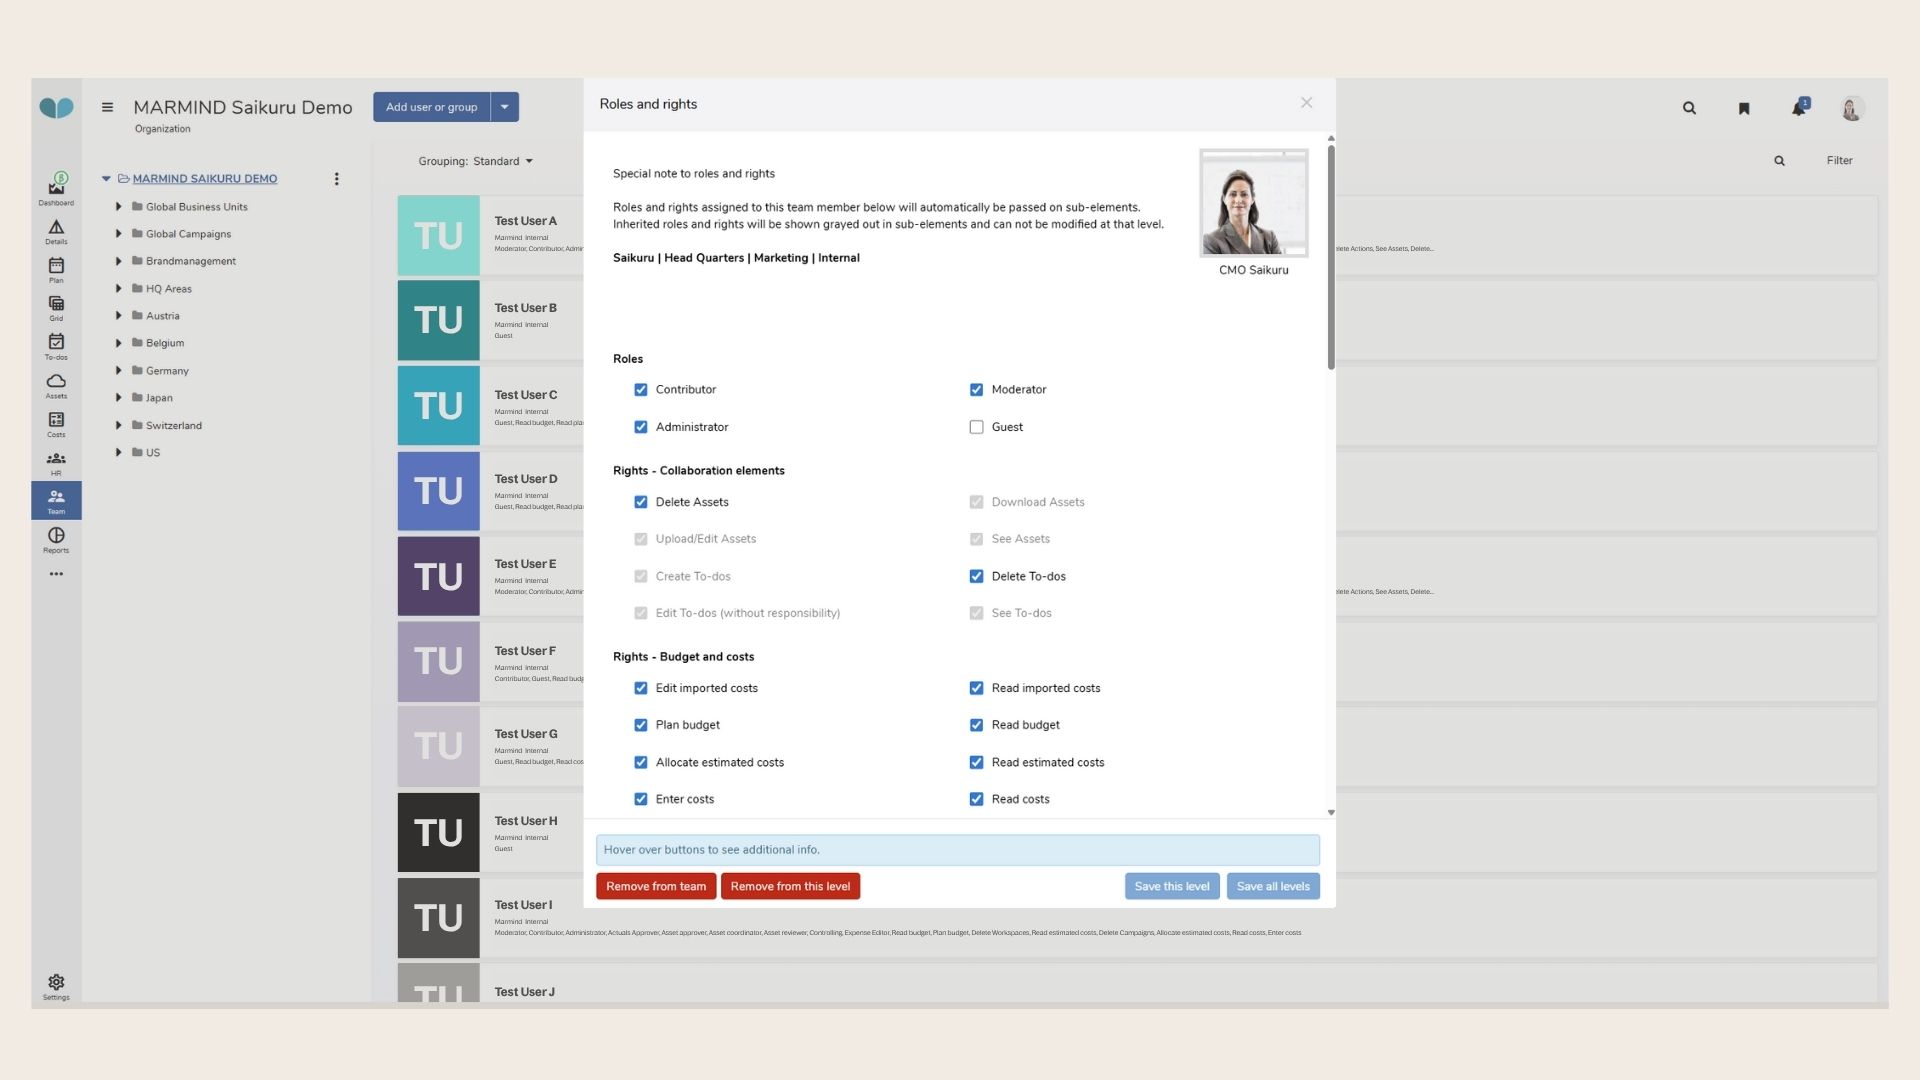
Step 3: Remove permissions
Using the information from the permissions report, navigate back to the tree structure and the “Team” module to reassign those permissions within the elements identified in the report:
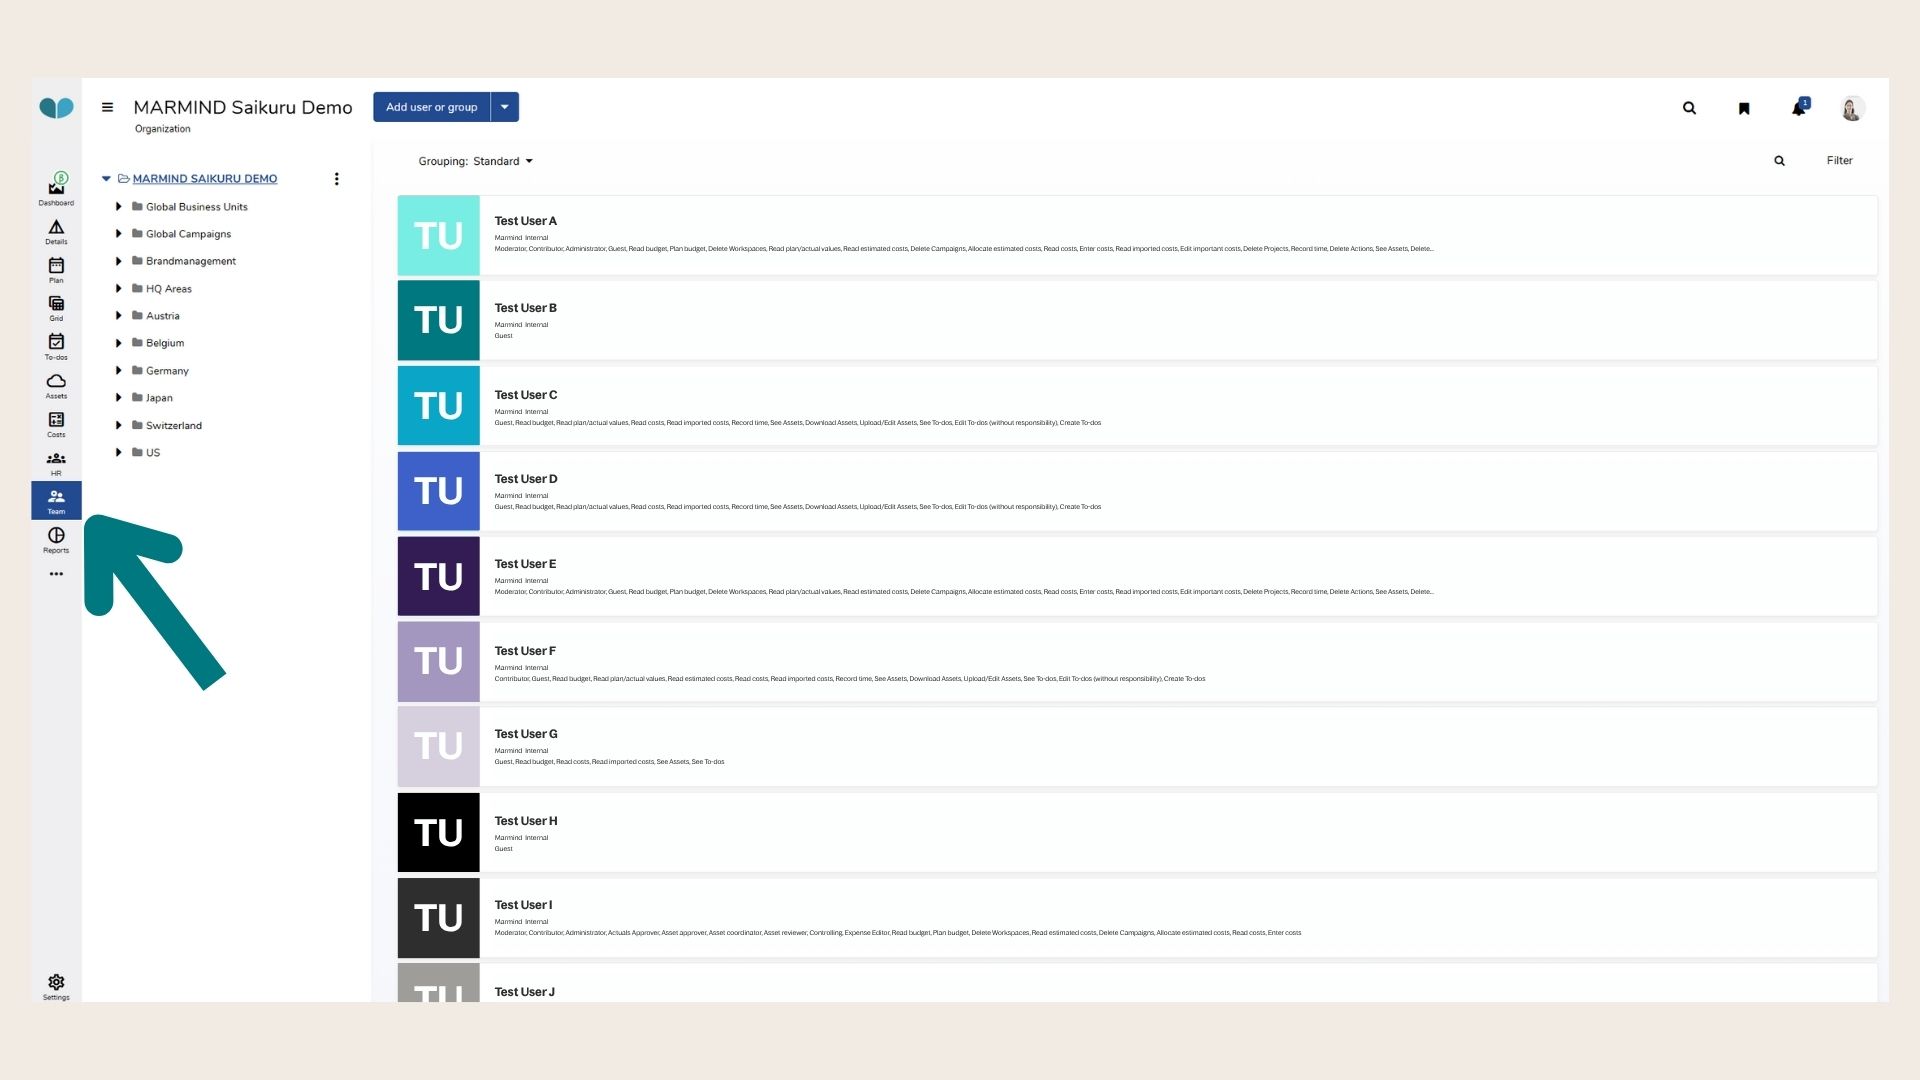
Click on the user and remove the permissions by clicking on the checkboxes and then click on the “Remove from Team” button on the bottom.
Step 4: Delete User in the Settings
After removing all the permissions, navigate back to the user list in the settings.
Hover over the icon of the desired user and click on the checkmark.
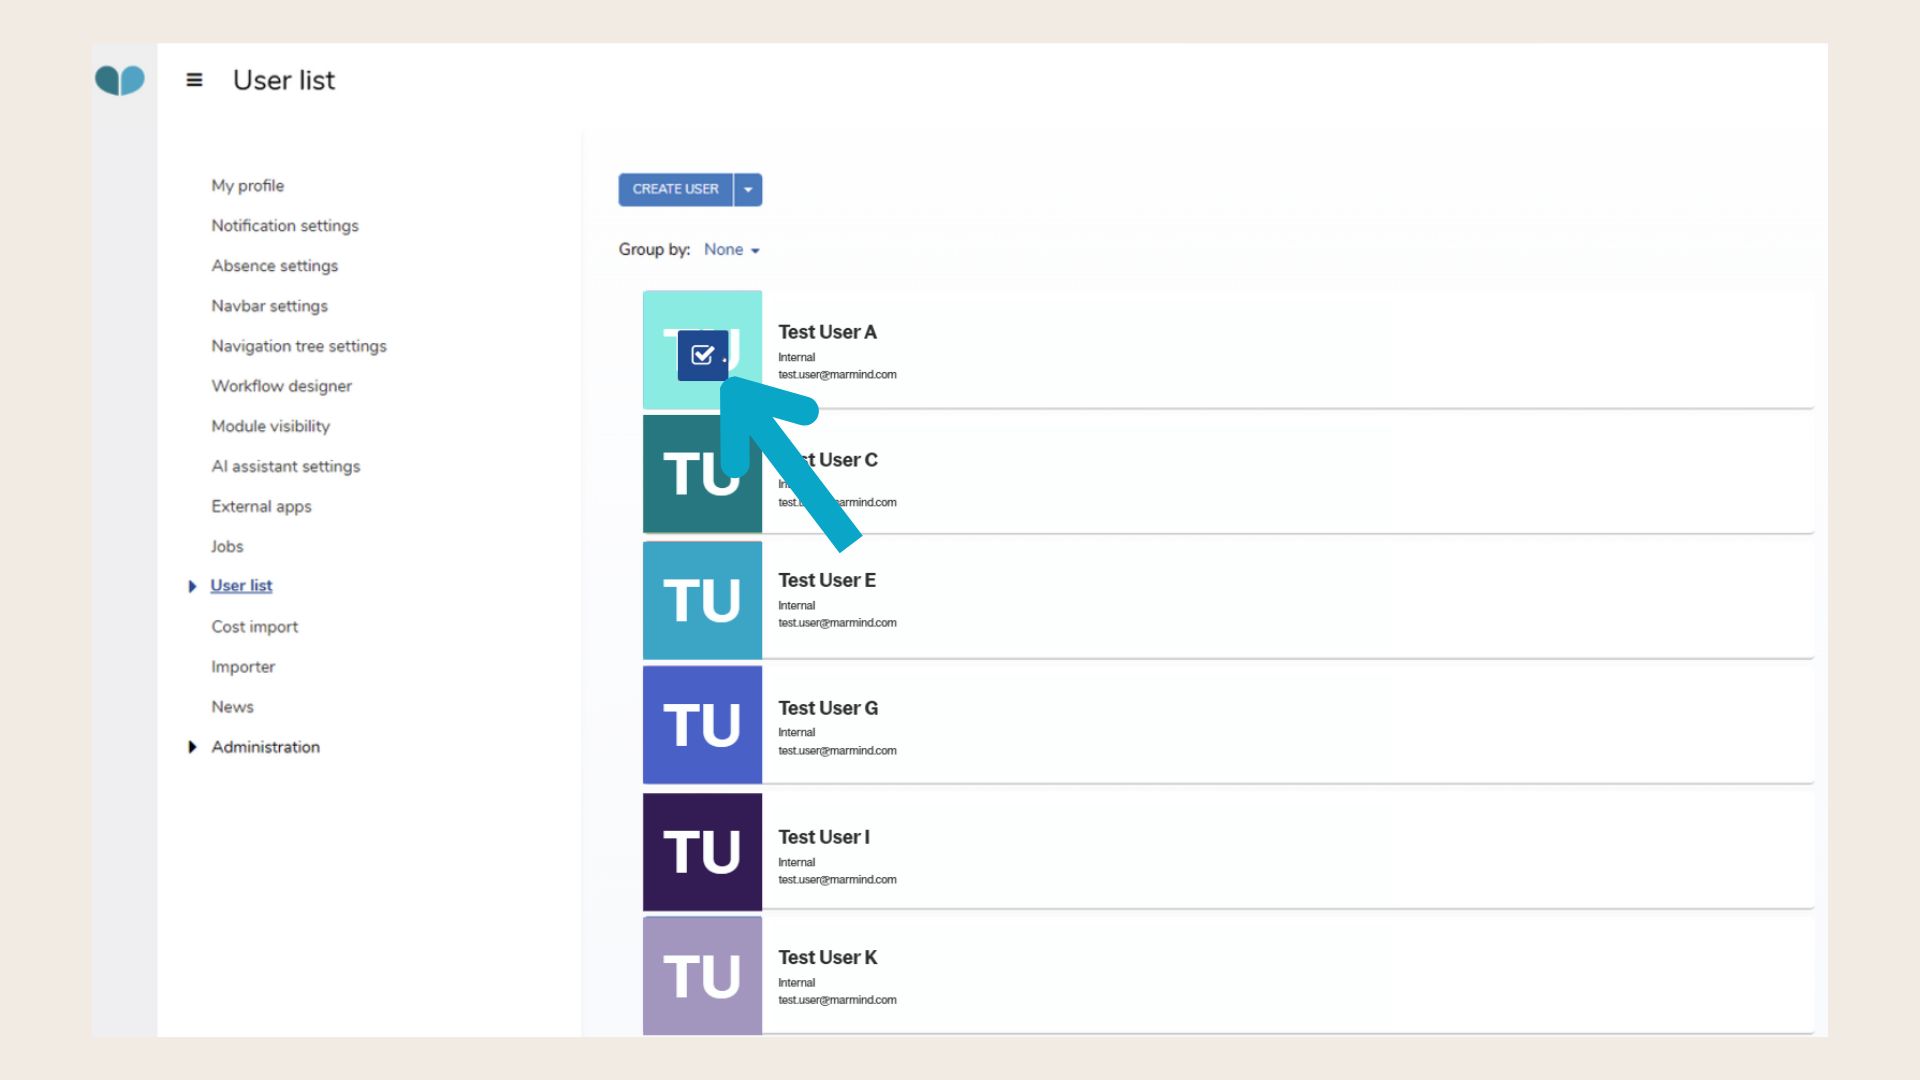
Now, the blue button on top display the option to “Delete Selected User”. You are then asked to confirm again. After this action, the user is deleted.
If you get the following error message:
Error User still assigned to teams, please remove user from all teams before deleting.
you have not removed all team associations for this user. Go back to the Team Module and make sure to remove the roles and permissions on every structure in the navigation tree.
❓ FAQs