📄 Summary: What You’ll Learn in This Article
This article shows you how to update your personal profile in Marmind, change your password or email address, and configure your individual notification preferences.
-
Access and update your profile settings
-
Adjust personal notification preferences
-
Understand how in-app notifications work
🧑🤝🧑 Who Should Read This?
This article is most useful for:
-
All Marmind users who want to customize their profile settings or notification preferences.
✔️ Prerequisites: What Should You Know Before Getting Started?
Level: Easy
Access required: Active Marmind user login
-
No prior knowledge is needed.
Location of the User profile
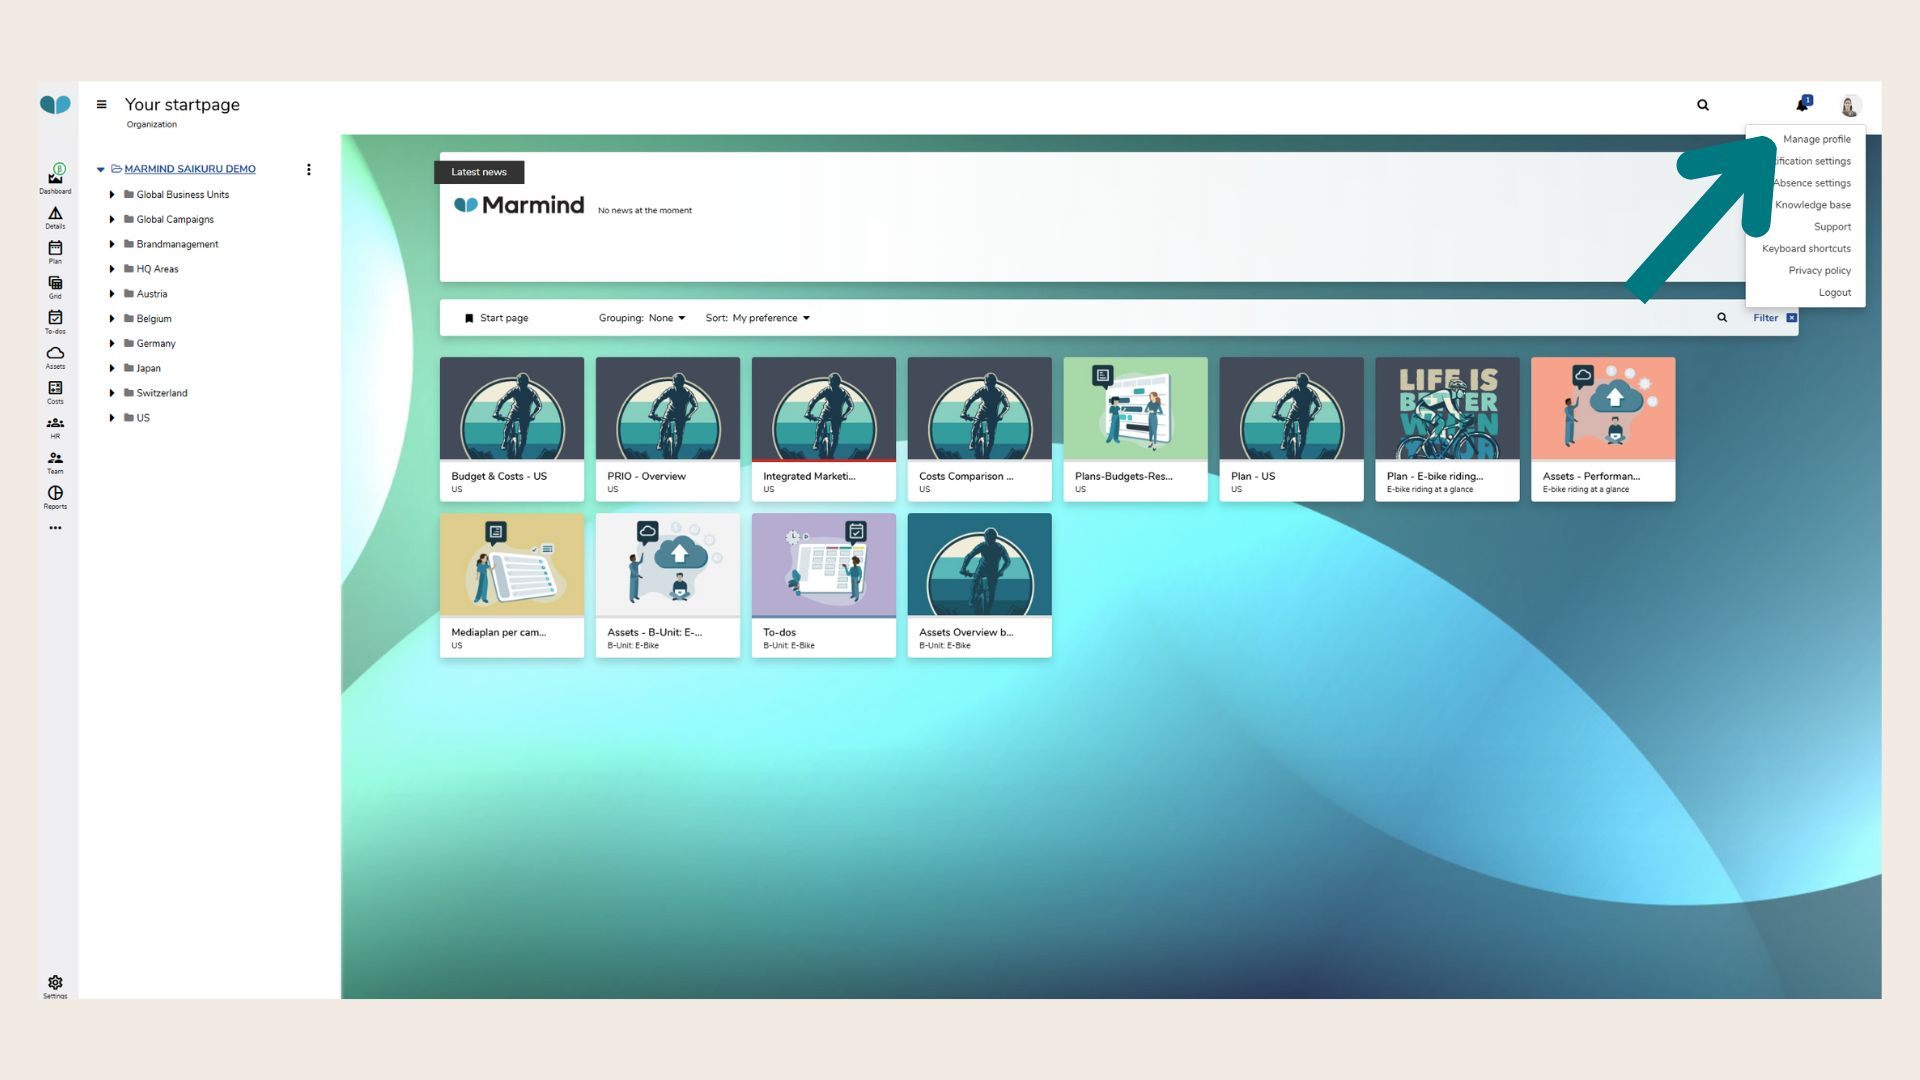
To adjust your individual profile settings:
-
Click your round profile icon in the top right corner.
-
In the dropdown menu, click “Manage profile.”
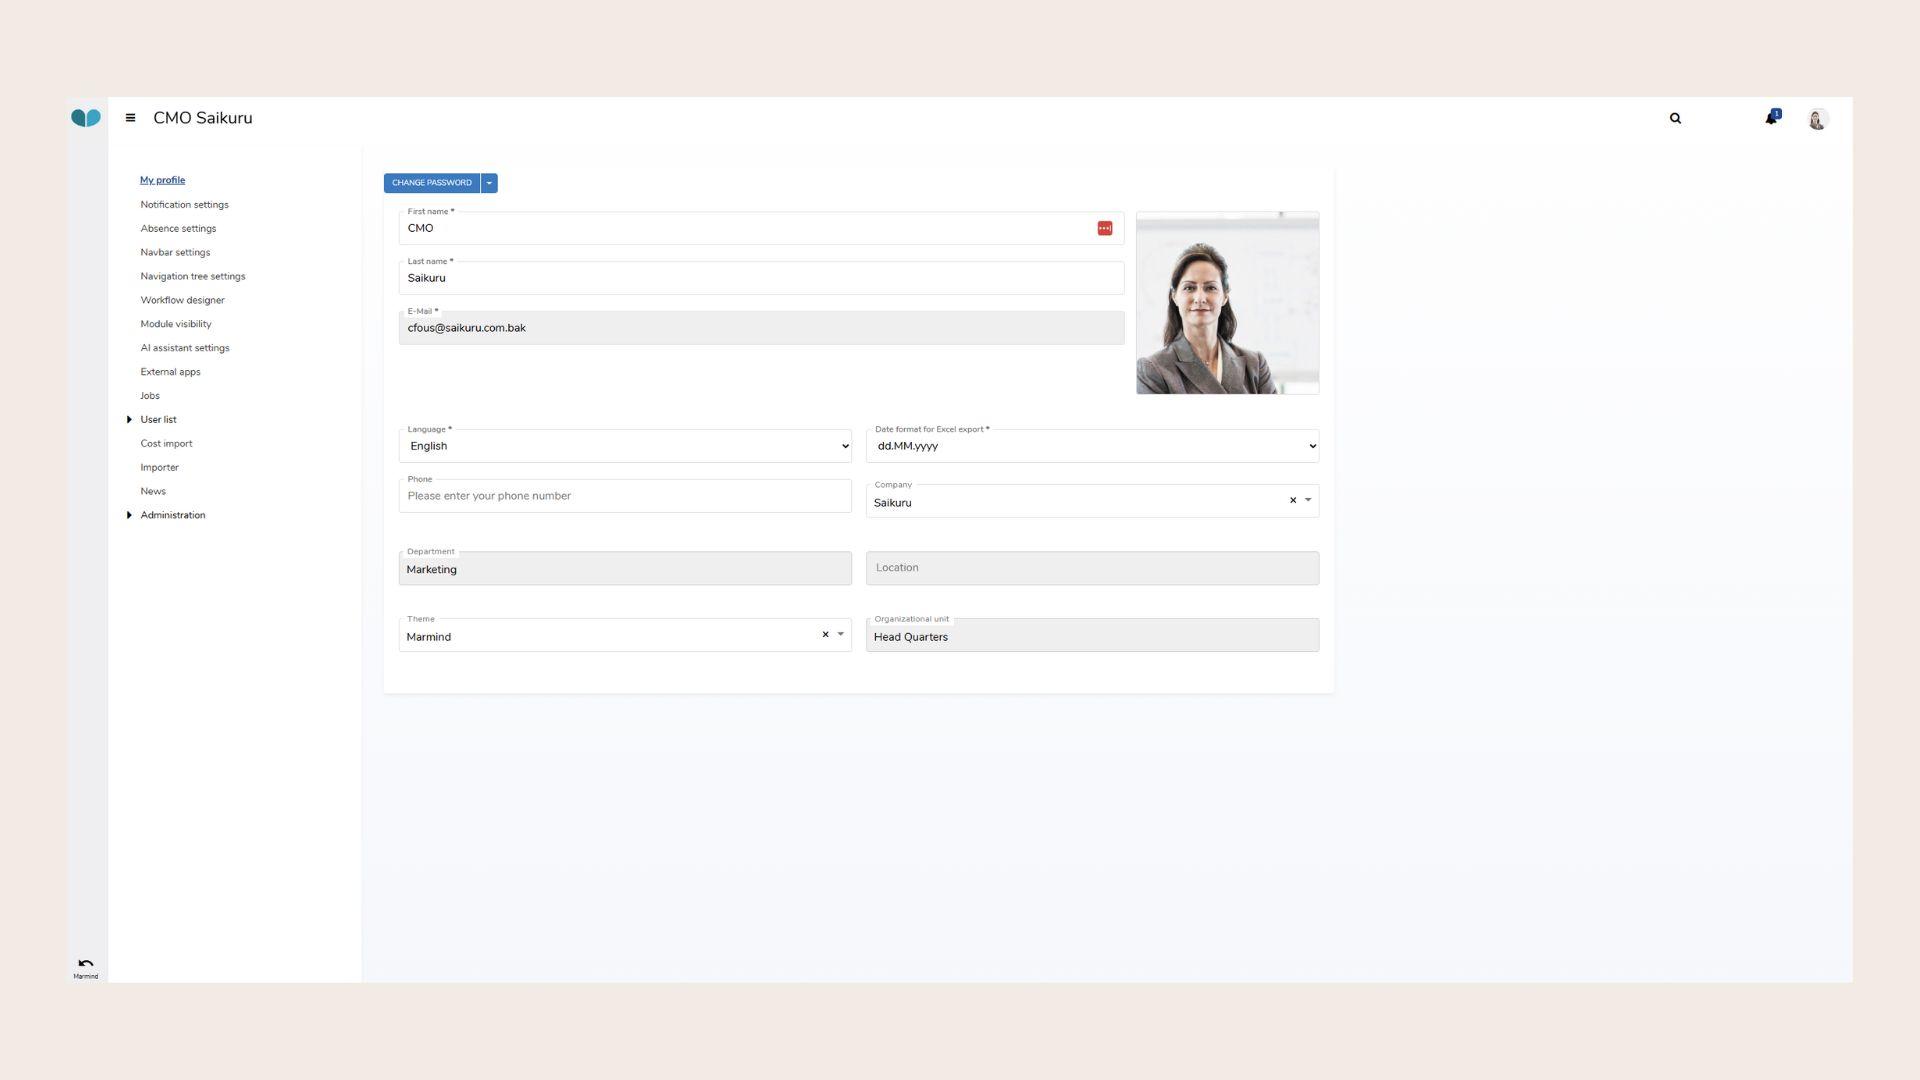
Within “Manage profile,” you can update the following information:
-
Profile image – Upload a photo from your computer
-
First Name and Last Name
-
Language – Choose between German and English
-
Date format
-
Phone Number
-
Company
-
Theme
📌 Display only (greyed out):
-
Email address – Can be customized via the dropdown menu (see below)
-
Department, Location, and Organizational Unit – managed by your administrator
Note: Administrators may see more options in the navigation tree.
Note: Passwords and email addresses can only be changed by administrators.
Notification Settings
To manage your personal notifications:
-
Click your profile icon
-
Select “Notification settings” from the dropdown menu
.jpg?cb=c6da1016c4452669855b5f14cf9da868)
MARMIND supports two types of notifications:
-
In-app notifications (displayed in the notification center – bell icon)
-
Email notifications with different frequency offerings.
Notifications are grouped into three areas:
-
General (e.g., mentions, object changes)
-
To-dos
-
Budget & Expenses
-
Additional Budget & Expenses
-
Bookmarks
Tip: Hover over any setting to see an explanation of what the notification does.
Note: Administrators may see more options in the navigation tree.
Important: You’ll only receive notifications for items for which you have permission rights.
The notification bell icon in the header shows unread notifications as a blue number.
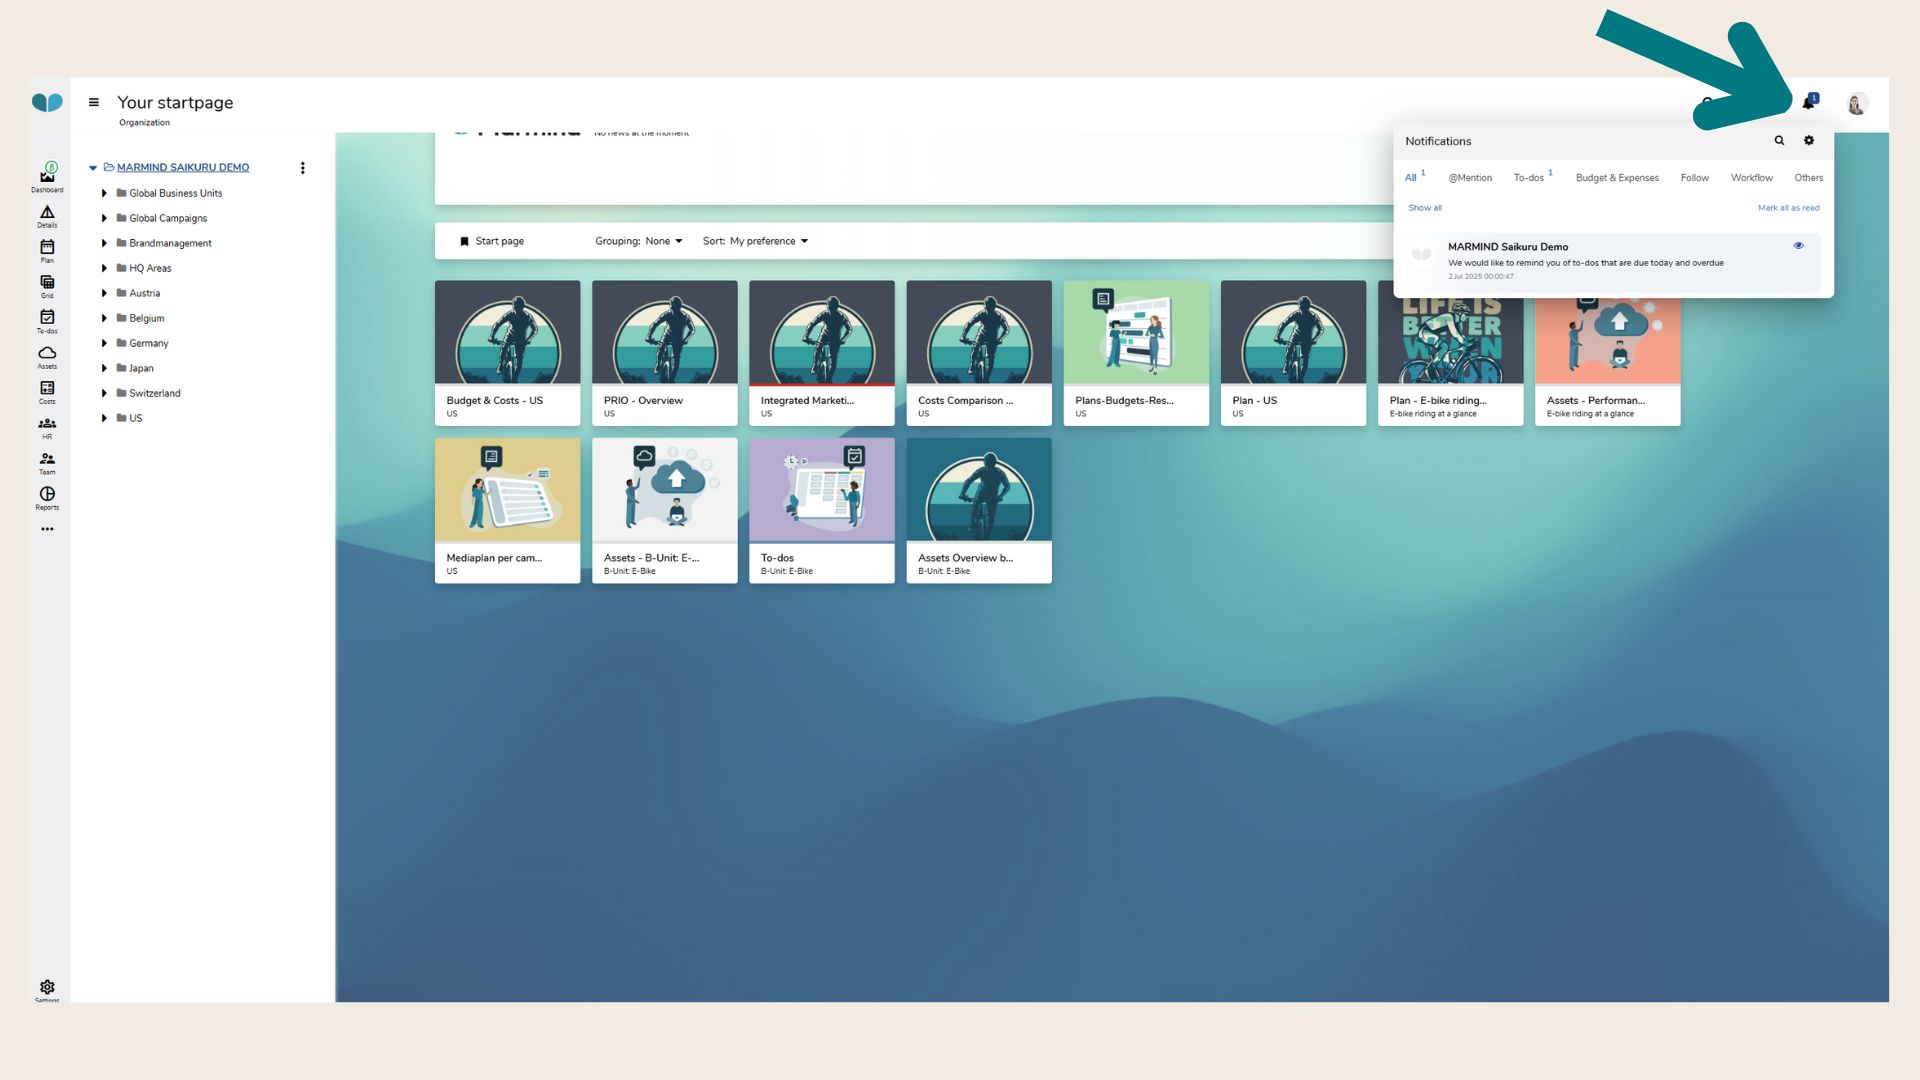
The Notification Center has 7 sections:
-
All – Every notification
-
@Mention – Mentions in comments
-
To-dos – Assigned or updated to-dos
-
Budget & Expenses – Changes or imports
-
Follow – Followed item updates
-
Workflow – Workflow-related updates
-
Others – General system or project messages
You can:
-
Click the eye icon to mark individual notifications as read
-
Toggle between “Show all” and “Show unread”
-
Use “Mark all as read” for convenience
-
Use the gear icon to go back to notification settings
-
Use the magnifying glass icon to search notifications
❓ FAQs