📄 Summary: What You’ll Learn in This Article
This article explains how to configure, save, and share personalized views within the Grid Module of Marmind. You’ll learn how to adjust object and attribute selections, save views as bookmarks, and enhance readability and navigation through sorting, column editing, and color highlighting.
-
Saving your grid view
-
Configuring your grid view
🧑🤝🧑 Who Should Read This?
This article is most useful for:
-
Marketing professionals tailoring the grid to their needs
-
Project managers who work with large data sets and need saved views
-
Team leads configuring shareable dashboards for reporting or collaboration
✔️ Prerequisites: What Should You Know Before Getting Started?
Level: Easy
Access required: None
-
No prior experience is required. This is an introductory guide to configuring grid views.
Save Grid Views Using Bookmarks
Just like in the Dashboard or Cockpit, you can create and personalize multiple grid views in Marmind. These configurations - also known as bookmarks - allow you to customize the layout, select specific data, and switch between different perspectives depending on your use case.
Saving a Bookmark
-
Open the Grid Module from the left navigation.
-
Select the objects and attributes you want to display.
-
Fine-tune filters, column size, sorting, and layout.
-
Save as a bookmark by clicking on the bookmark icon on the top left, then clicking on the blue “Save new bookmark” button.

Share Bookmarks With Others
Bookmarks can be shared with your team in two ways:
-
Context-based sharing: Only visible to team members with access to that specific object/context.
-
Global sharing: Visible to all users when the root folder is selected as the context.
Pin Your Favorite Bookmark
If you switch between views often, pin important bookmarks from the “Saved Bookmarks” menu to access them quickly.
Object (Row) Selection
Control which items appear in the grid using the Select Objects menu.
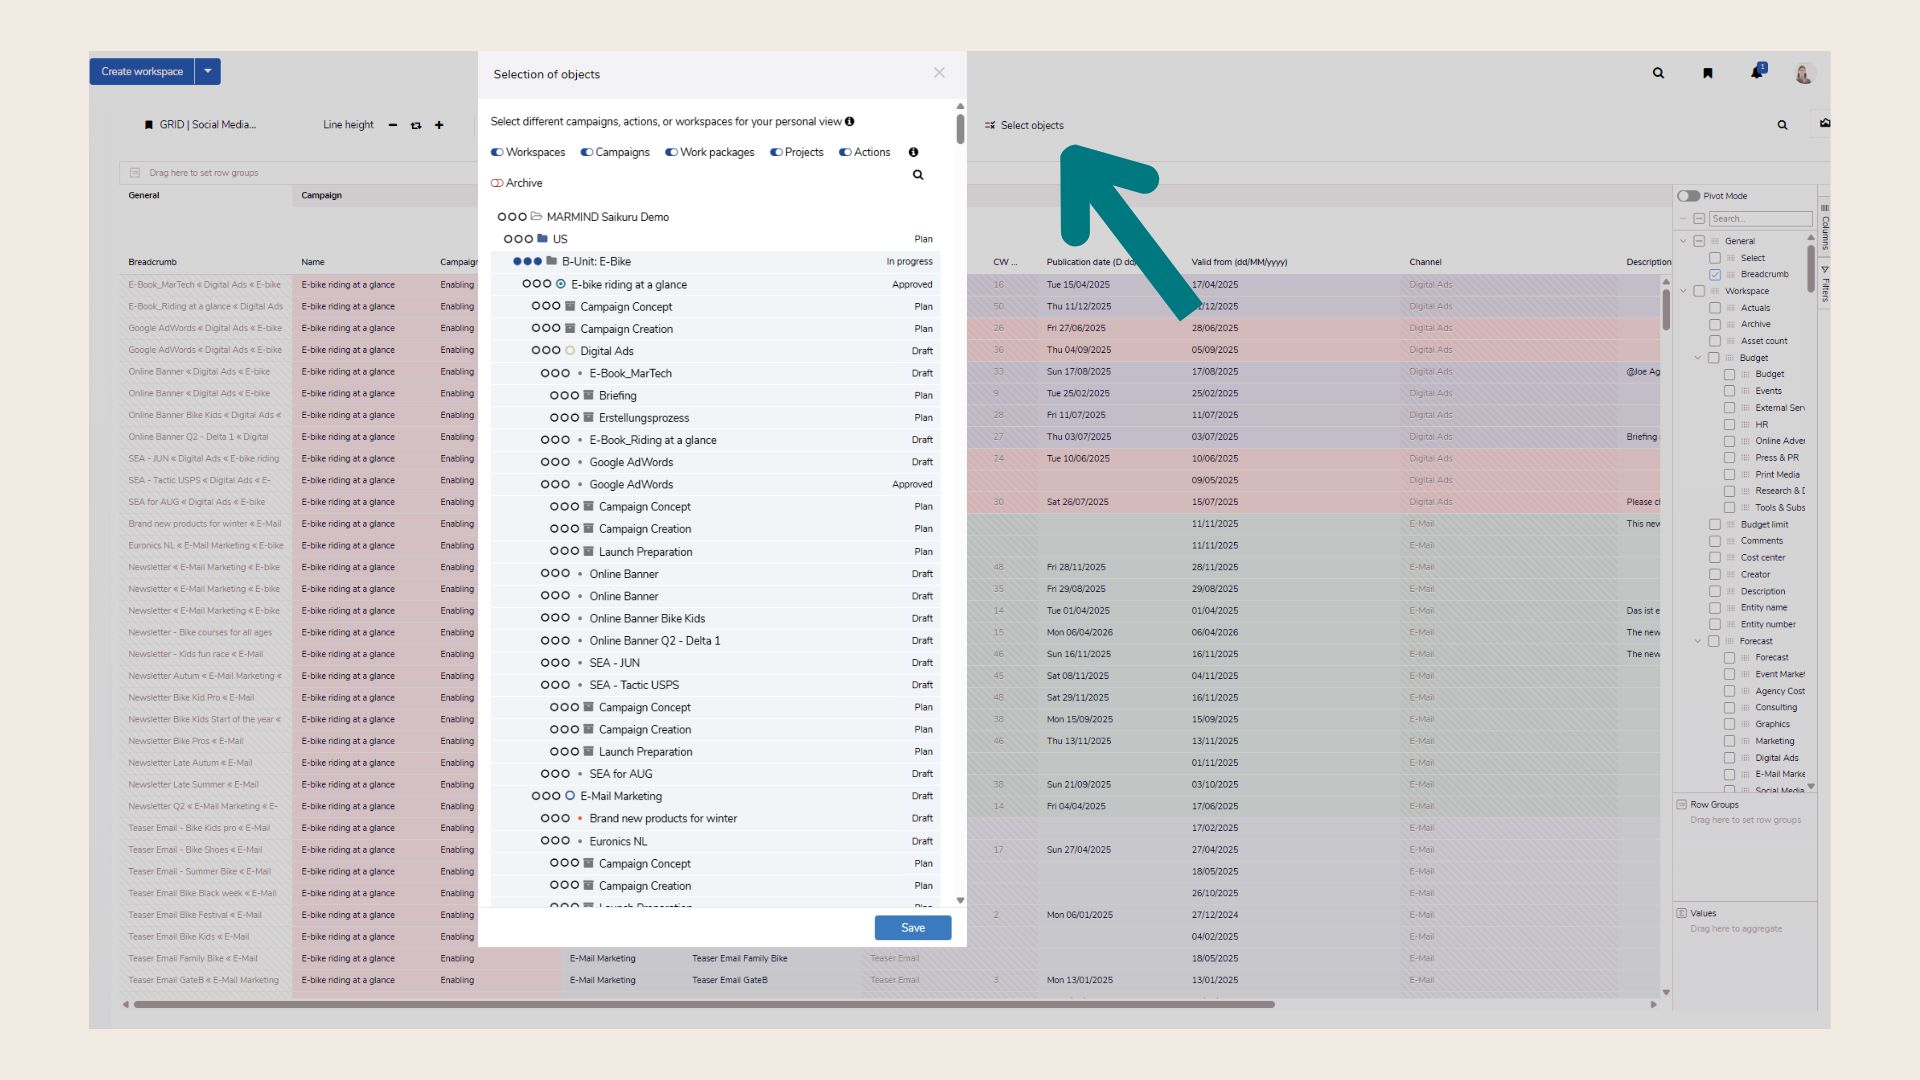
-
Click Select Objects to open the object tree.
-
Use toggles to hide/show object types.
-
Select desired marketing objects—highlighted in green when active.
-
Objects with sub-objects will include newly created sub-entries automatically.
-
Click Save to apply your selection.
Attribute (Column) Selection
Choose which data fields (attributes) to display per object type.
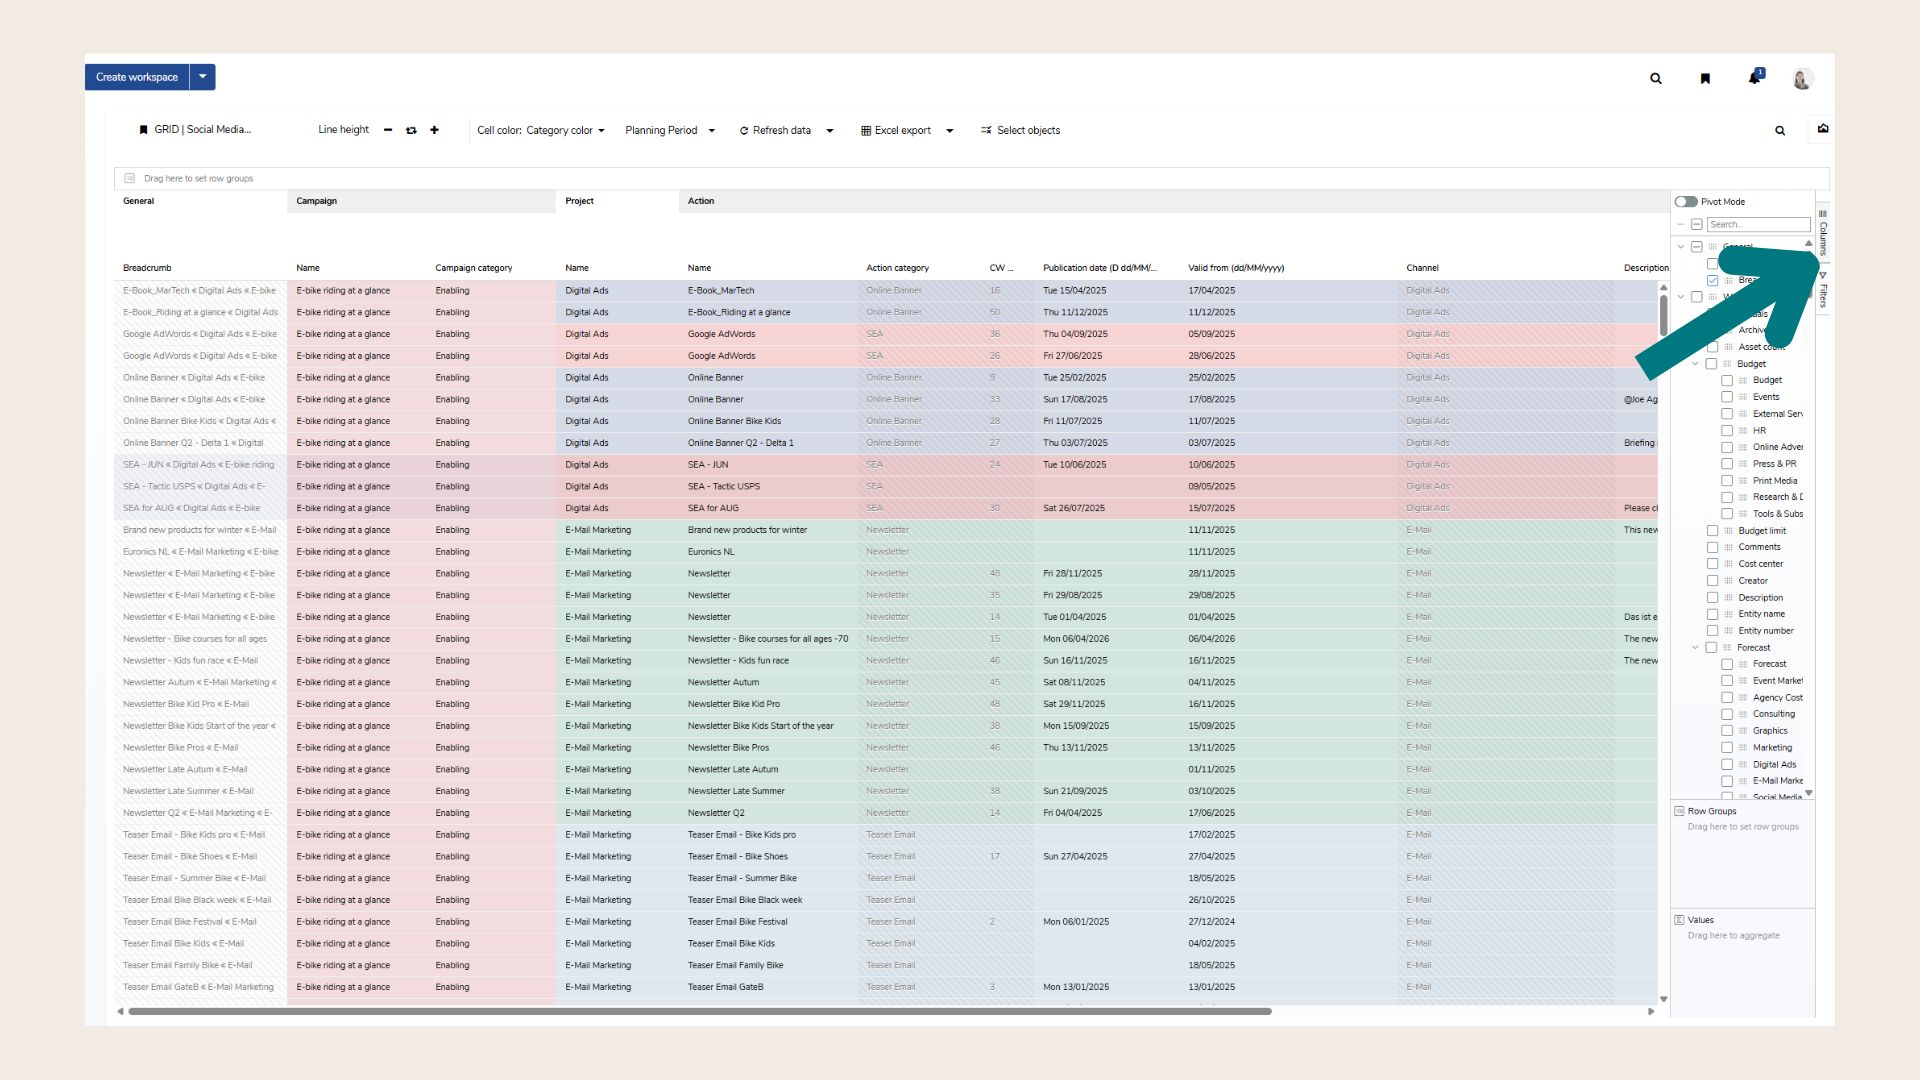
-
Open the Attributes Menu on the right side.
-
Expand/collapse object types using the arrow next to the checkbox.
-
Select/deselect all fields at once by ticking the box next to the object type.
-
Use the search field to find specific fields (e.g., “valid” shows “valid from” and “valid to”).
-
Custom fields will appear here if defined and used in the selected context.
Editing Columns and Rows
Rearranging Columns
Drag and drop column headers to reposition them.
Adjusting Column Width
-
Drag the edge of a column to resize manually.
-
Double-click the edge to apply automatic width.
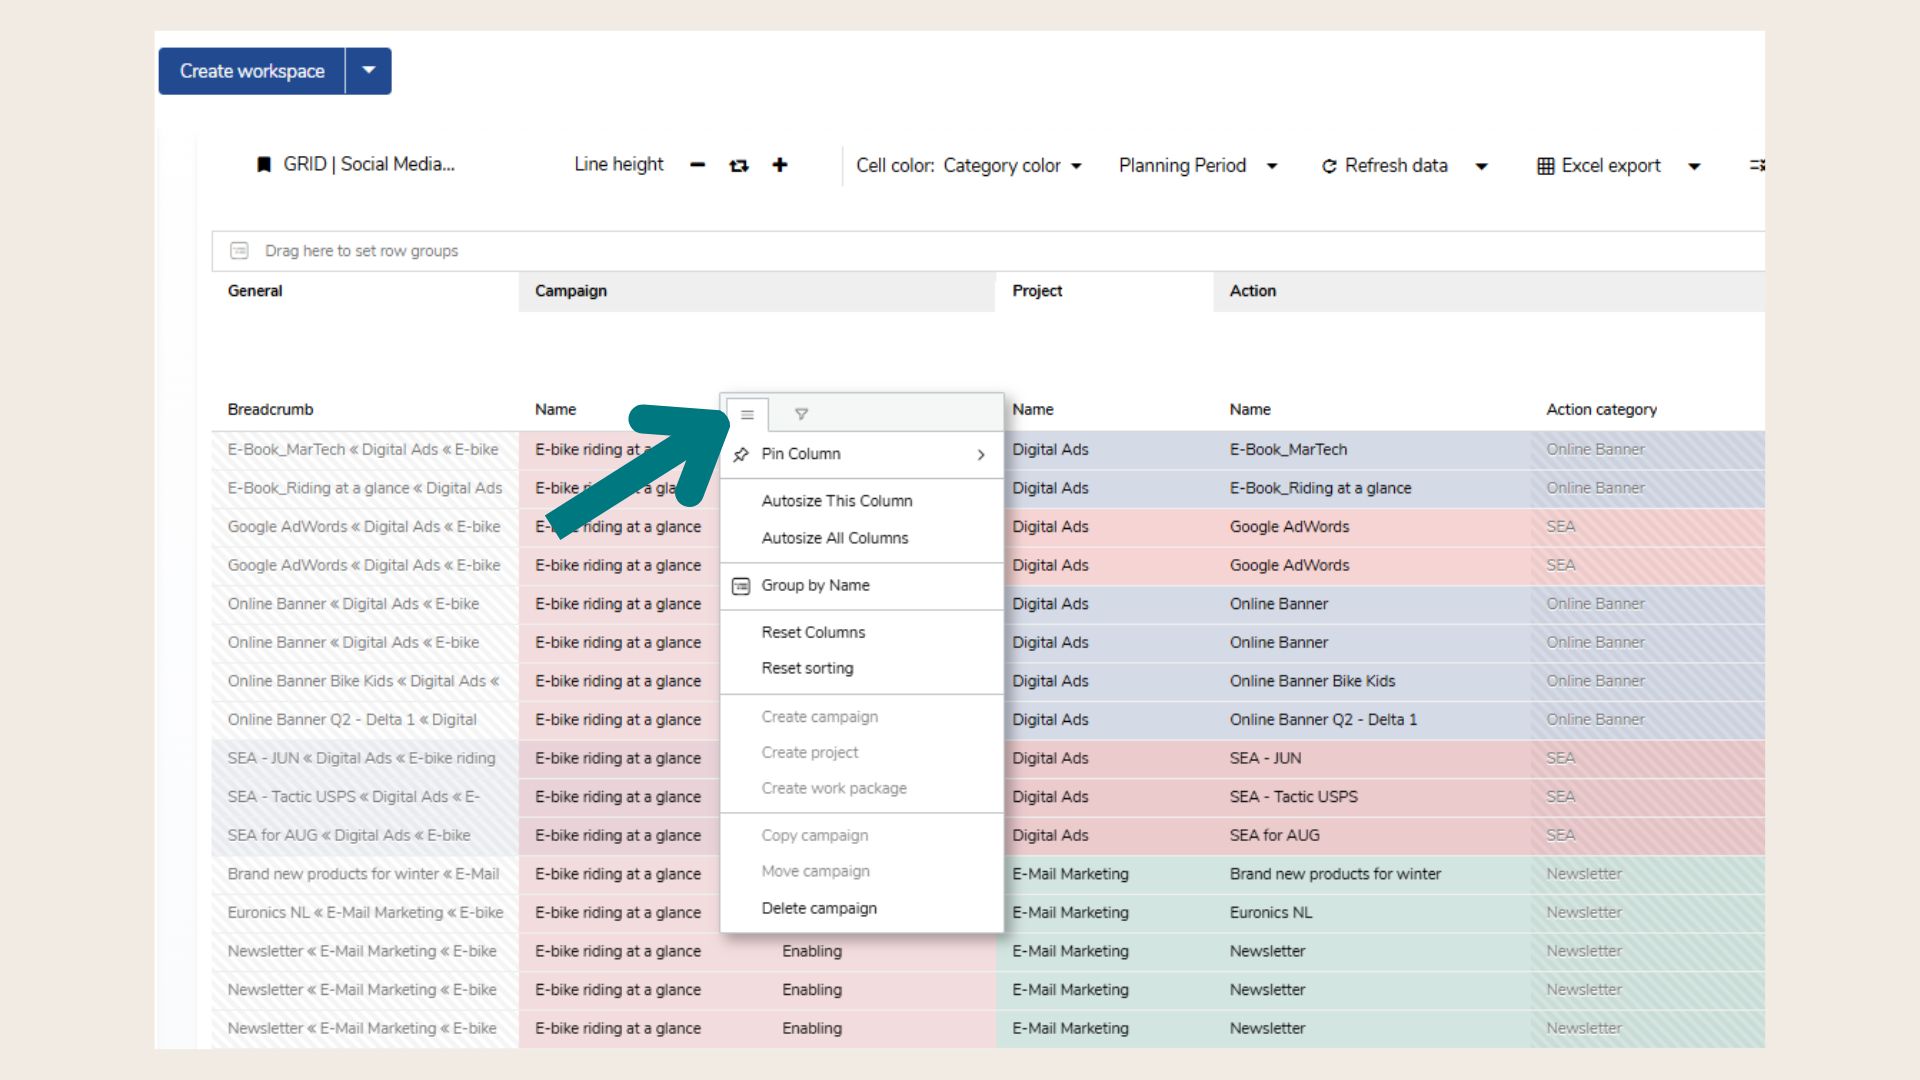
Pin Columns
To keep key columns visible while scrolling horizontally, pin them to the left or right:
-
Open the column menu (next to column header).
-
Choose Pin Left or Pin Right.
Adjusting Row Height
Set how much information each row displays:
-
Click the line height icon (right next to the bookmarks) to toggle between three levels.
-
Level 3 = automatic height (expands to fit content).
-
Click “Reset” to return to default line height.
Sorting
Default Sorting
Objects follow the tree structure by default.
Sort Alphabetically
Click a column header to:
-
First click: Sort ascending
-
Second click: Sort descending
-
Third click: Remove sorting (revert to tree view)
Multi-Column Sorting
To sort by multiple columns:
-
Hold SHIFT and click additional column headers
-
Adjust order/direction for each
-
Remove individual sort rules by clicking again
-
Reset sorting from the column header menu
Highlighting Cells with Color
Improve visibility by applying cell color highlighting:
-
By Status
-
According to Object Color
-
According to Object Category
❓ FAQs