📄 Summary: What You’ll Learn in This Article
This article explains how to manage assets in Marmind using the Censhare integration.
-
Key functionalities of the Censhare Integration
-
Step-by-step tutorial for uploading assets
🧑🤝🧑 Who Should Read This?
This article is most useful for marketing teams, campaign managers, product owners, and digital asset managers who work with both Marmind and Censhare. It’s especially relevant for users responsible for uploading, managing, or referencing assets in Marmind, and for admins or IT staff setting up the integration, permissions, and SSO configuration.
✔️ Prerequisites: What Should You Know Before Getting Started?
Level: Intermediate
Access required: You will only be able to see this option if your company is using the Censhare integrator.
-
To get the most out of this article, readers should have basic familiarity with Marmind and Censhare and be able to navigate both systems.
Introduction to the Marmind - Censhare Integration
The integration enables access to the Censhare assets from the Marmind UI and synchronizes Asset versions and all metadata which is in the Censhare tab.
You can continue storing, editing, and managing your media assets in Censhare, but use Marmind for advanced campaign planning and monitoring. You will be able to access your media assets stored in Censhare from the Marmind UI and perform some basic operations on them, while staying in the Marmind system. For more general information about the integration, visit the article here
Step-by-Step: Managing assets on Marmind with a Censhare integration
Browsing and viewing assets
Open the Assets module in Marmind to see all assets referenced in the current context. Assets are displayed in list, grid, and compact views.
You can only see previews and details of assets you have permission to access in Censhare. Assets you do not have access to display blocked icon as a placeholder.
Use the Open in Censhare action in the asset details toolbar to view the asset directly in Censhare in a new tab.
.jpg?cb=a5d2df52a15a61bc980200aabab1add4)
In order to learn more about the Asset module in Marmind, visit the articles HERE
Step 1a: Upload an Asset from in Marmind
Navigate to the Campaign or Product where you want to upload the asset in Marmind and click on the Asset Module on the left:
.jpg?cb=320f9530ea359476b1e9f5bb71f70246)
Click the blue “Add asset” button at the top of the page:
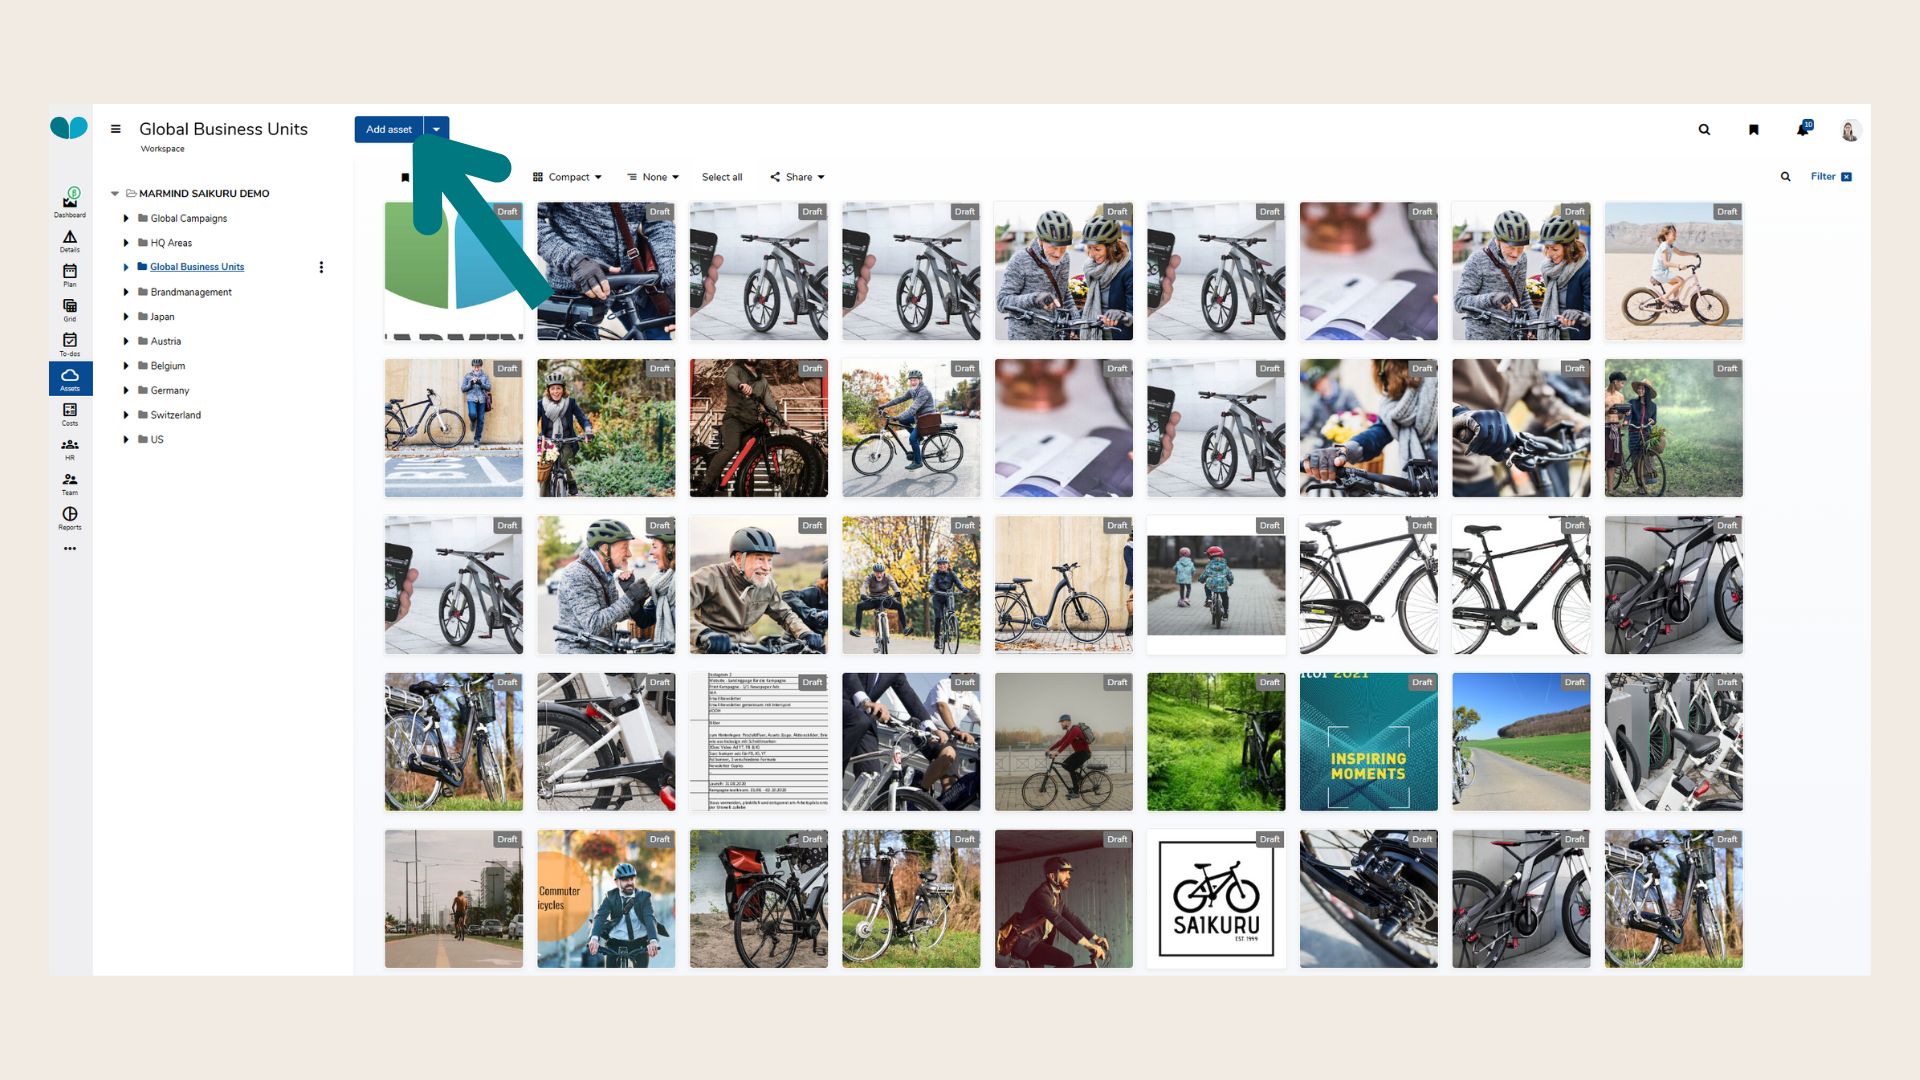
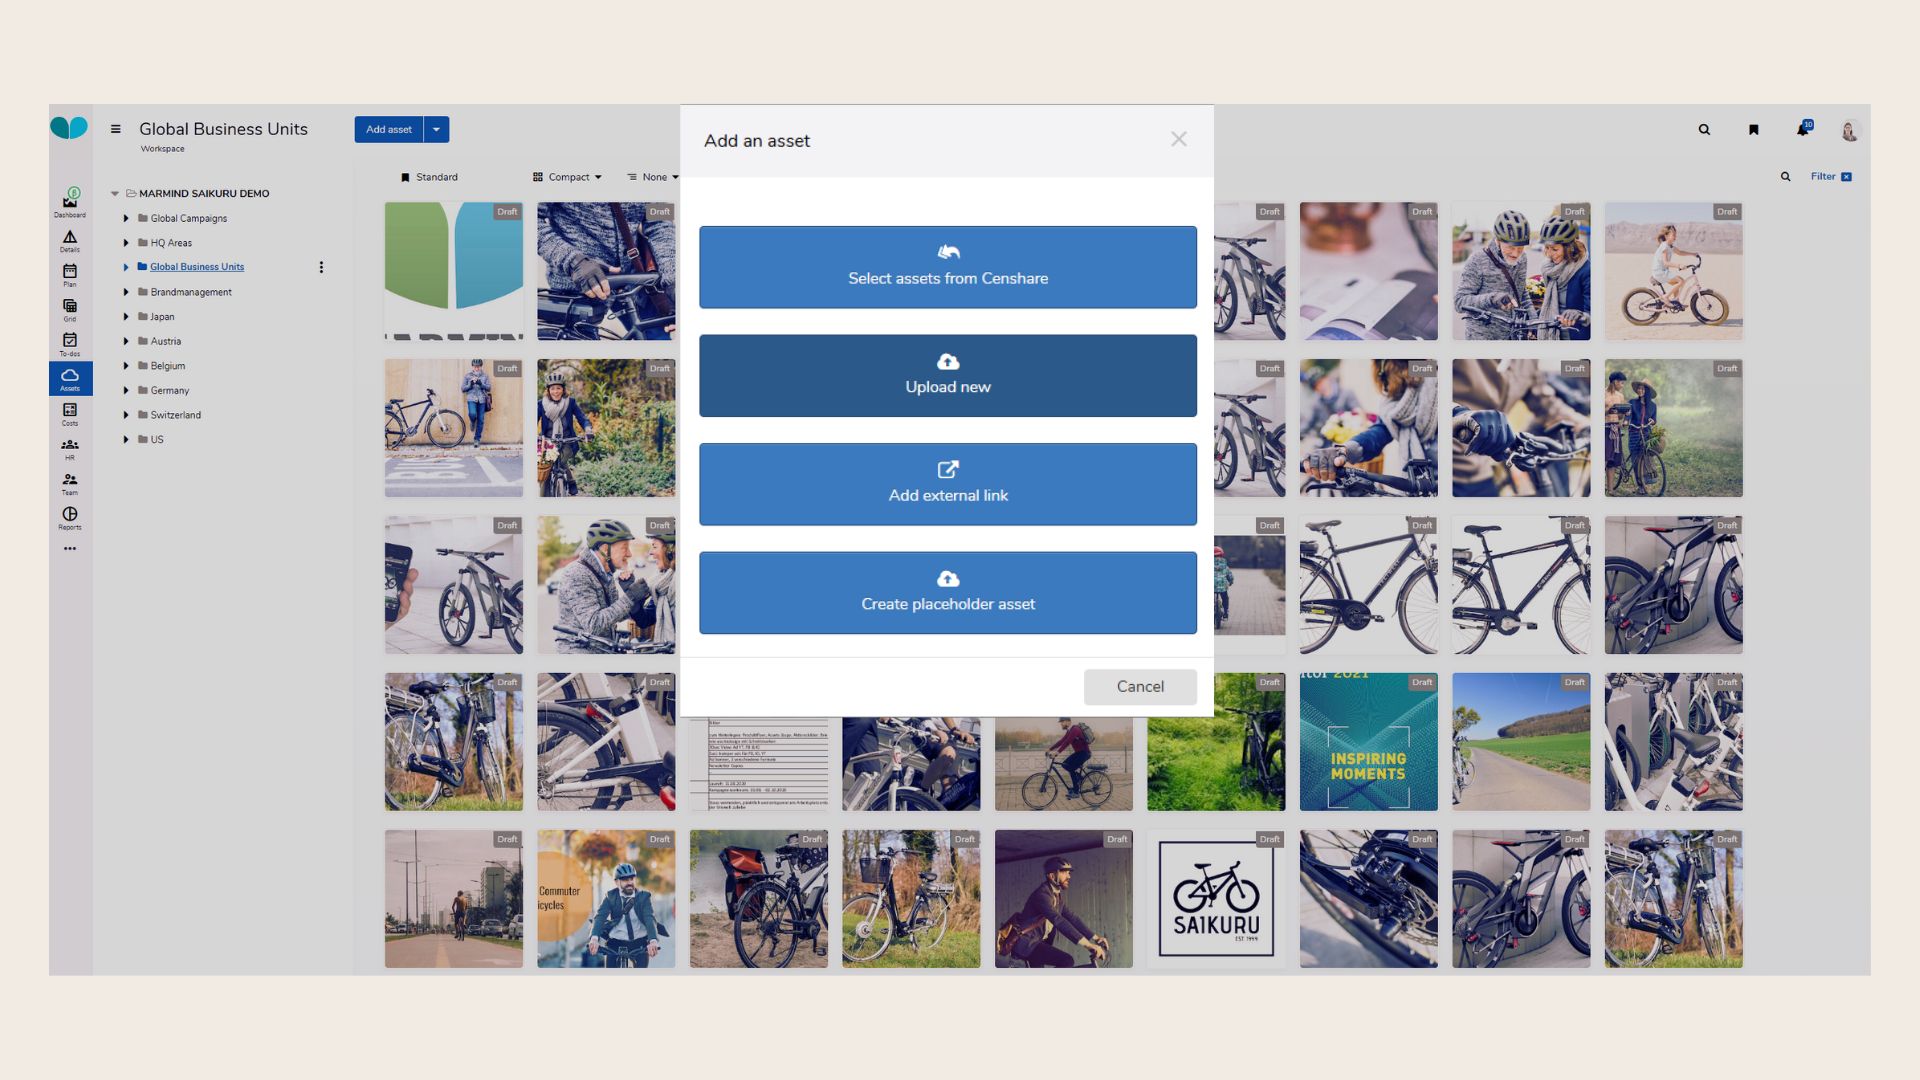
A pop-up window will open. There, you can select from which source you want to upload an asset.
The following options interact with Censhare:
-
Select assets from Censhare: A pop-up window will open and display all assets uploaded to Censhare.
-
Upload new: Upload an asset via file upload or drag and drop from your computer. The asset will then automatically be uploaded to Censhare, while a reference is automatically created in Marmind (You will see the asset listed in Marmind, but the original resides in Censhare).
Marmind will check for duplicates using file hashcode.
If duplicates are found:
-
If one duplicate is found: you can choose to use the existing asset or create a new one.
-
If multiple duplicates are found: click Use existing to open a selection dialog and choose which existing asset to reuse, or select Create new asset.
-
Use the Show only duplicates filter to isolate assets with detected duplicates.
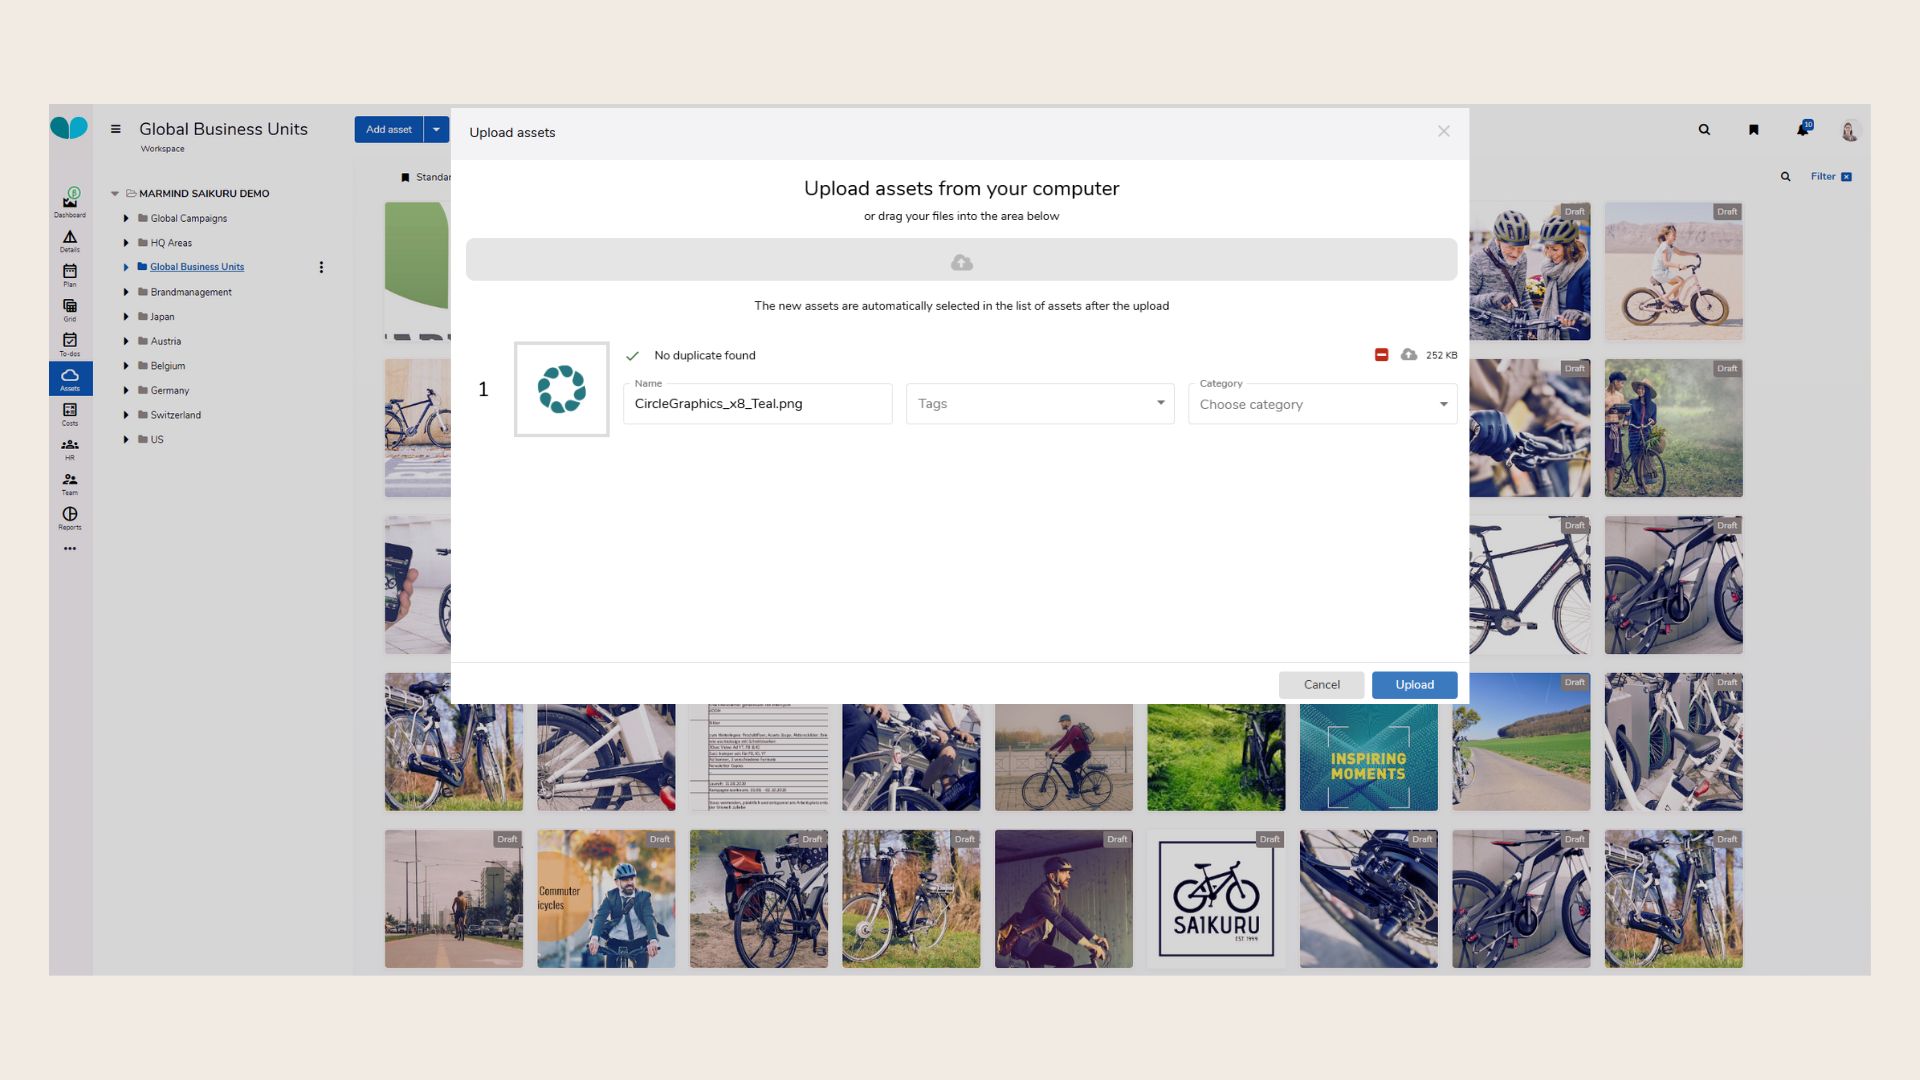
Click on the “Upload” button.
After upload, asset binaries are stored in Censhare in your assigned default domain. A reference is created in Marmind. Thumbnails and previews are generated asynchronously by Censhare and appear after a view reload.
You can also assign tags, a category, and a relation type per asset during upload, either individually or in bulk for all selected assets.
Step 1b: Upload an Asset from Censhare
Click Import from Censhare when managing assets in a campaign.
A new browser tab opens with the Censhare Asset Picker.
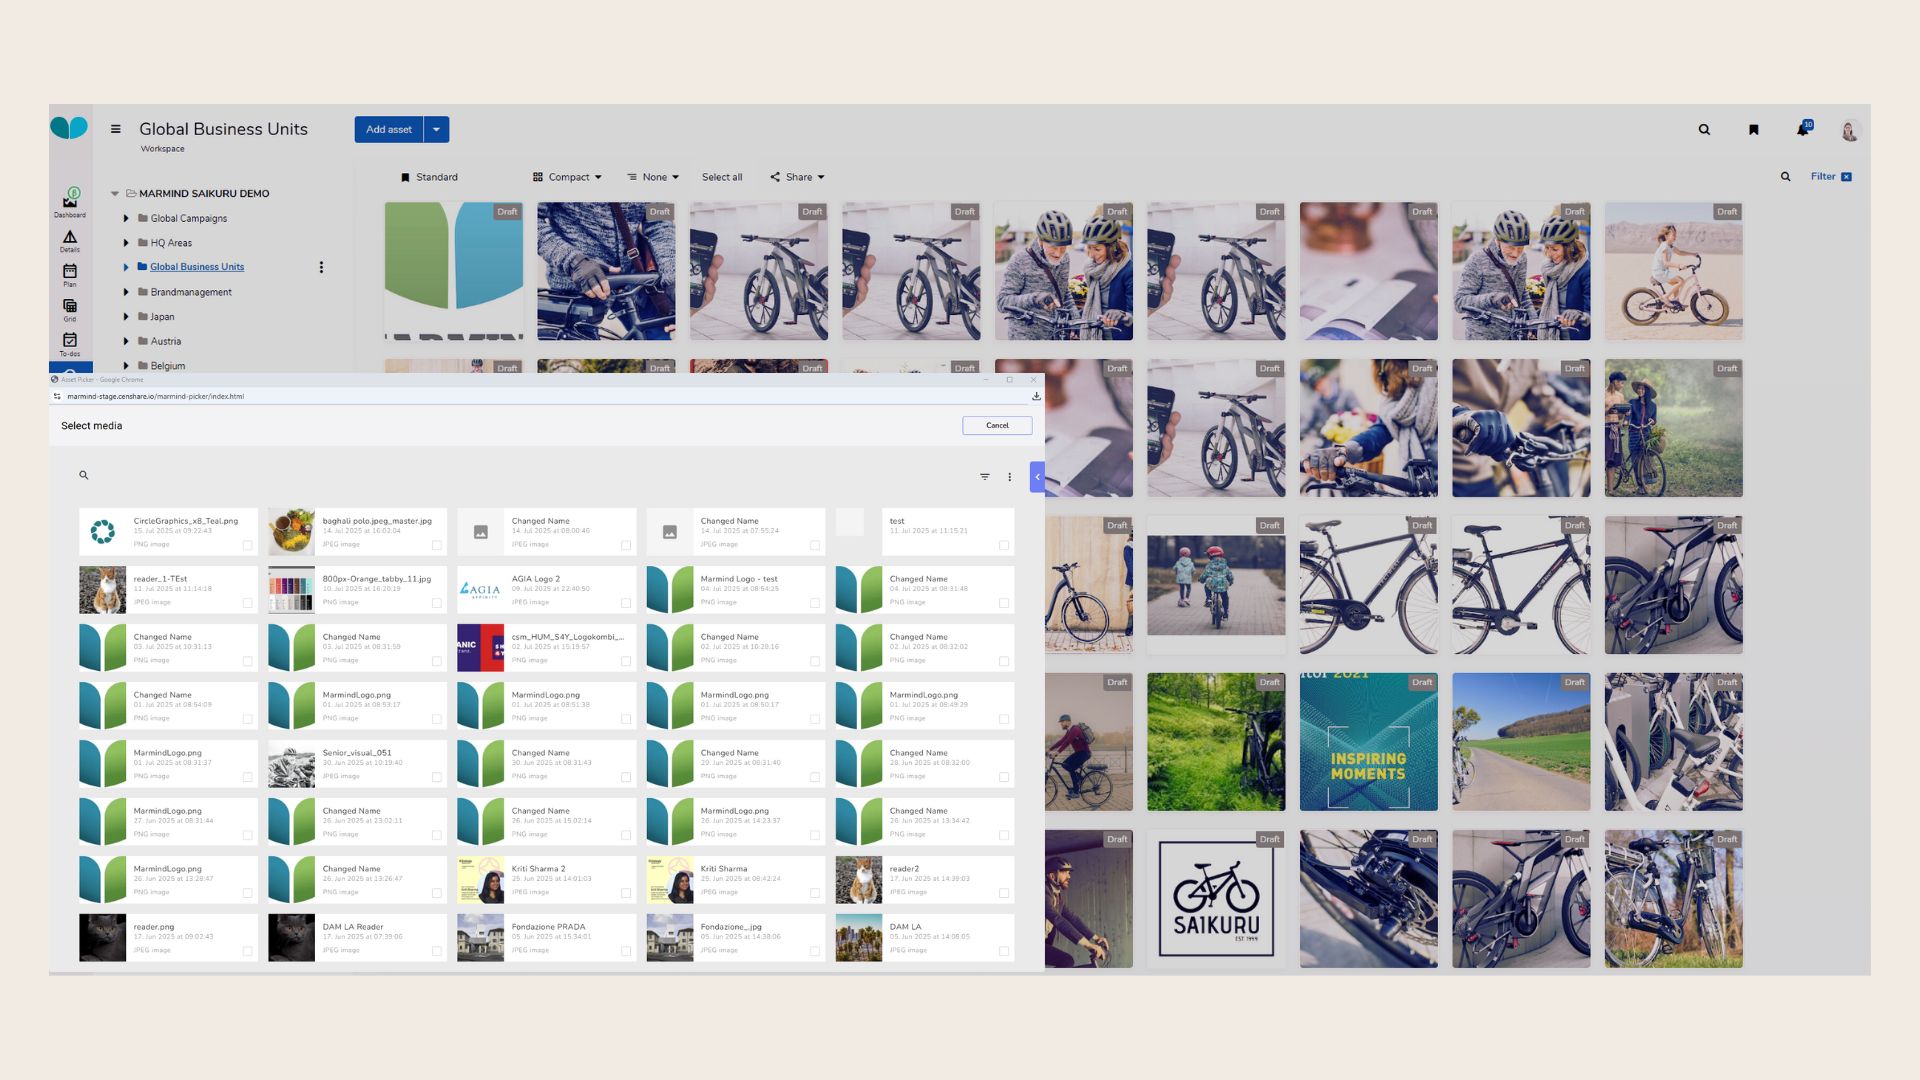
Search, filter, and select one or more assets.
The asset picker closes and the selected assets appear immediately in the Assets view. A reference is created in Marmind for each selected asset. The asset binary remains in Censhare.
If you attempt to add an asset that already exists in the current context, you will see the message: “The same asset already exists in the current context. Use the existing asset instead.
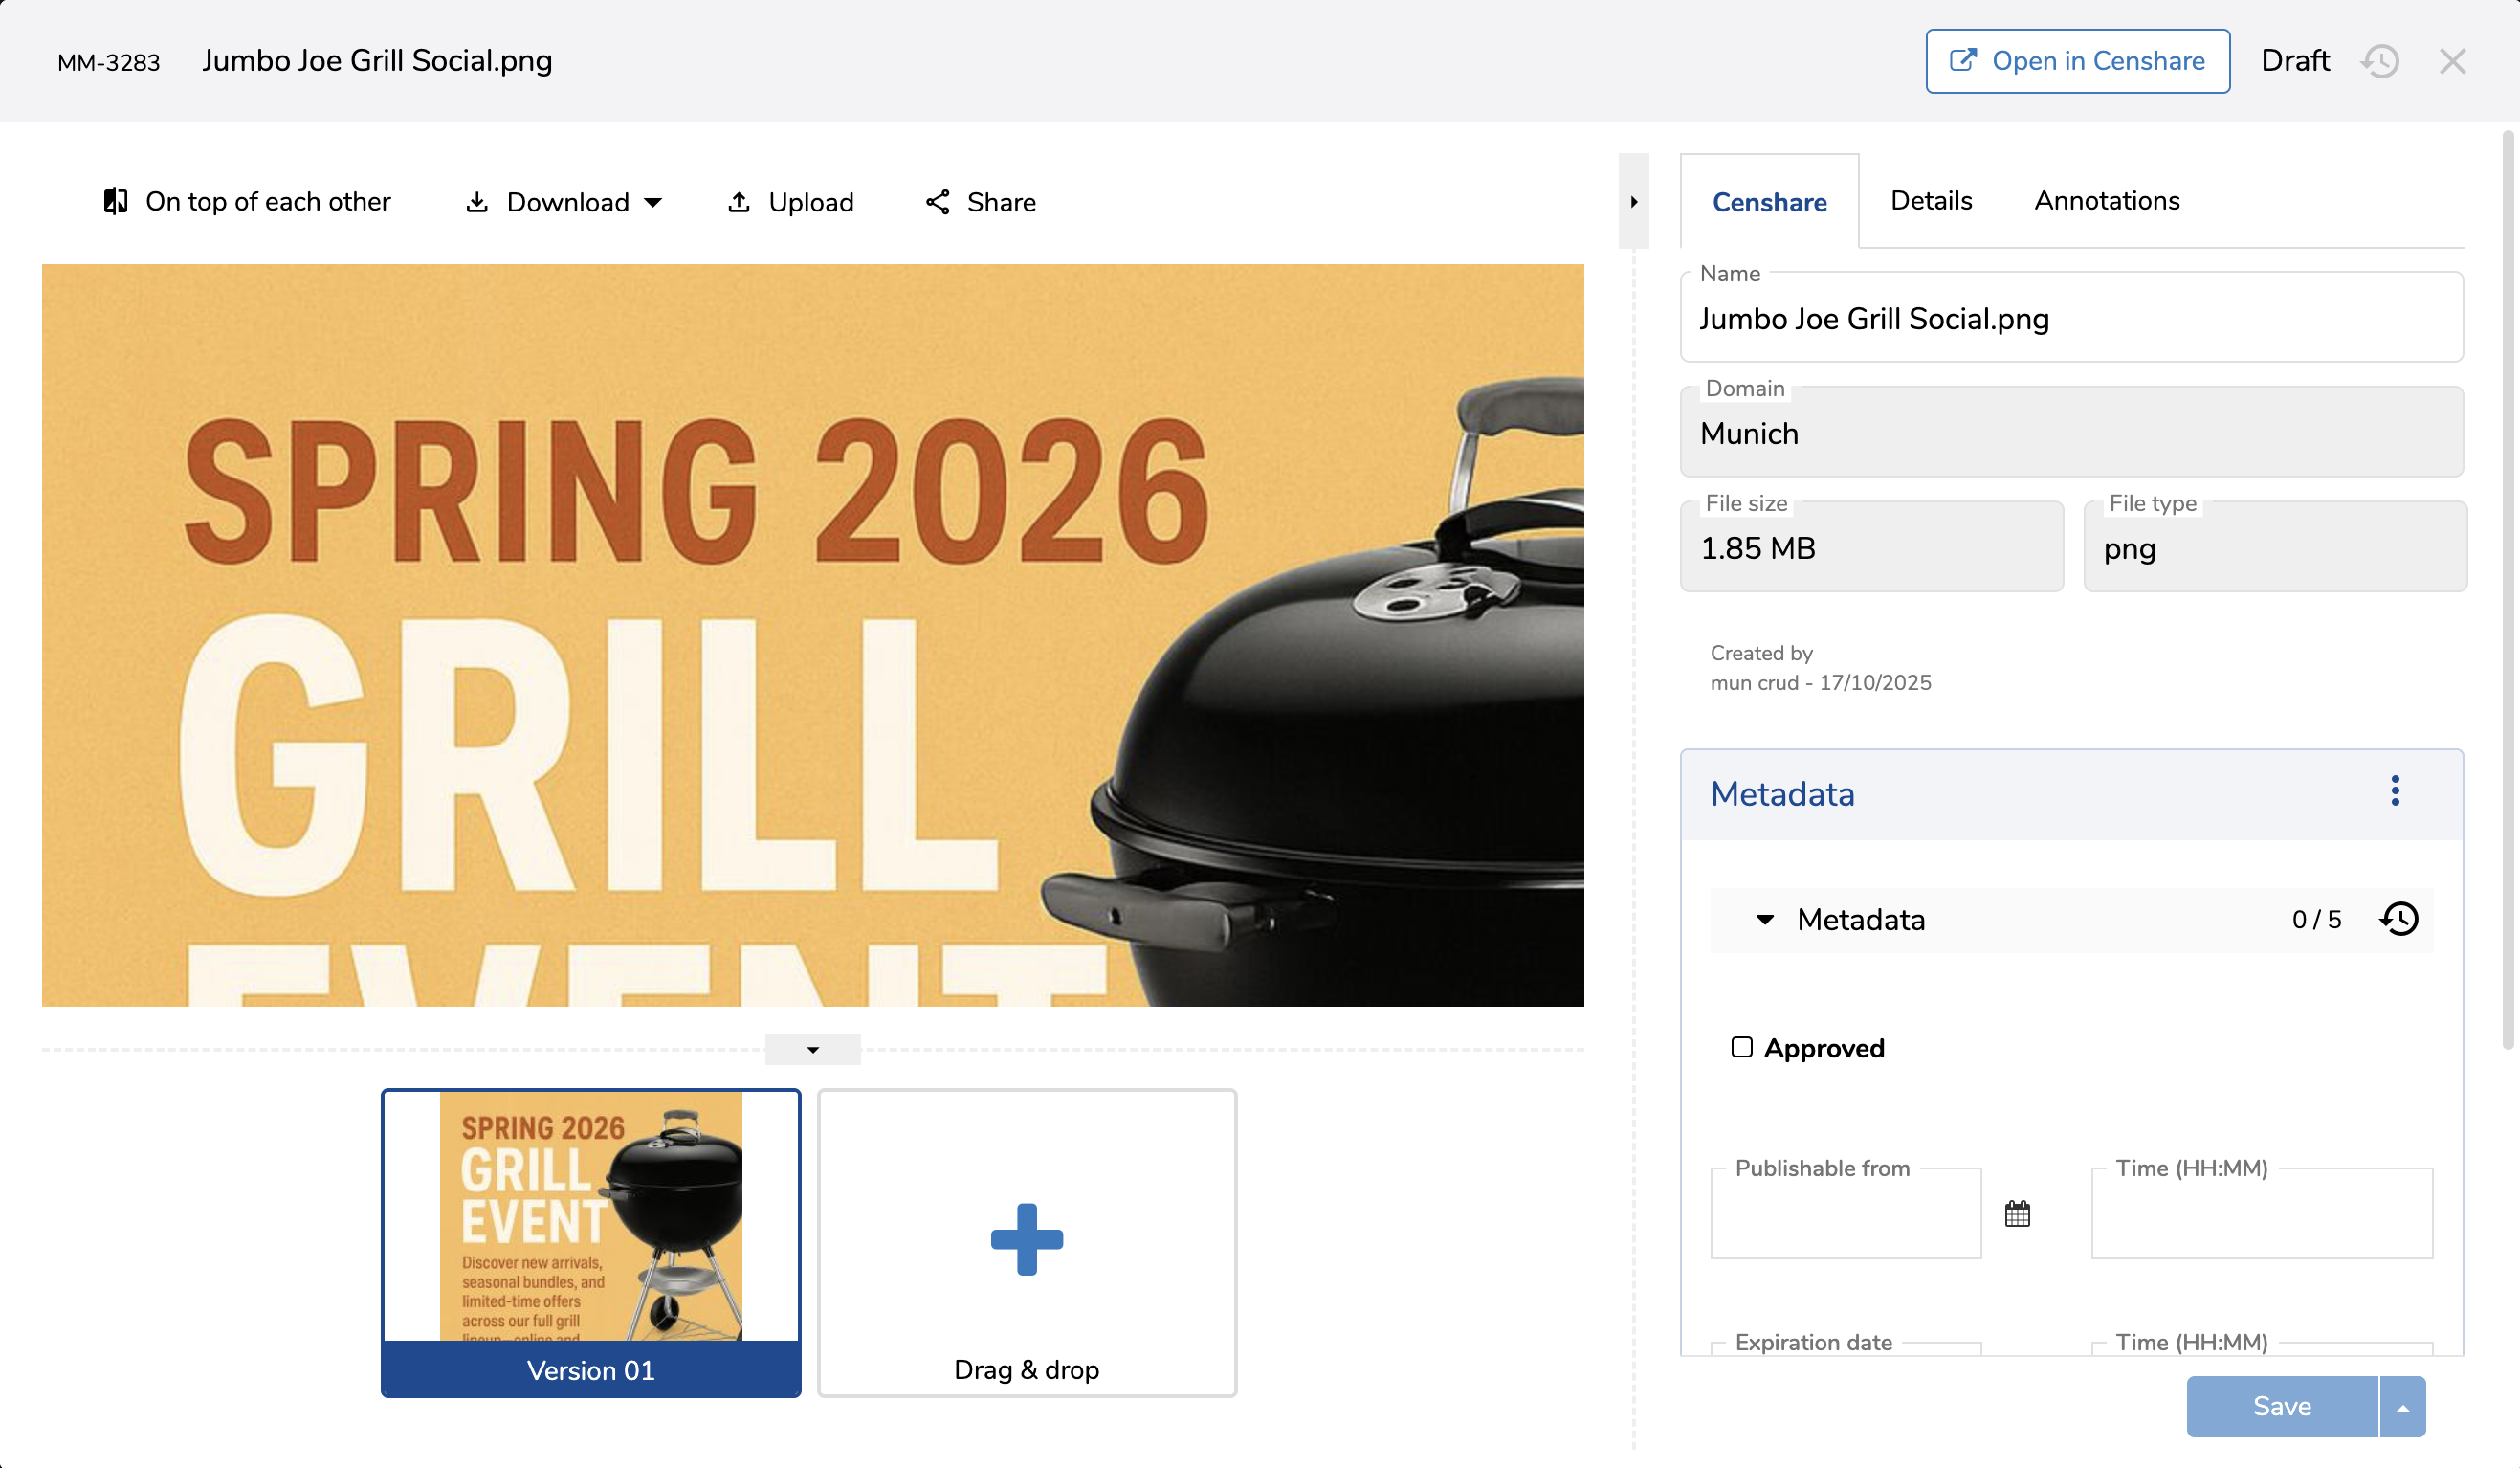
Step 2a: Edit Asset in Marmind
Click on the uploaded asset in Marmind to open its preview window.
You’ll be able to update the name.
Changes are saved in Censhare and reflected in the referenced asset in Marmind (if permissions allow). No manual sync is required for changes to reflect in Censhare. If you want to learn more about editing assets in Marmind, please visit the article HERE.
Step 2b: Edit Asset in Censhare
If you want to access the asset in Censhare, open the preview window and simply click on “Open in Censhare” in the top right corner. You will be automatically redirected to the Asset in the Censhare platform.
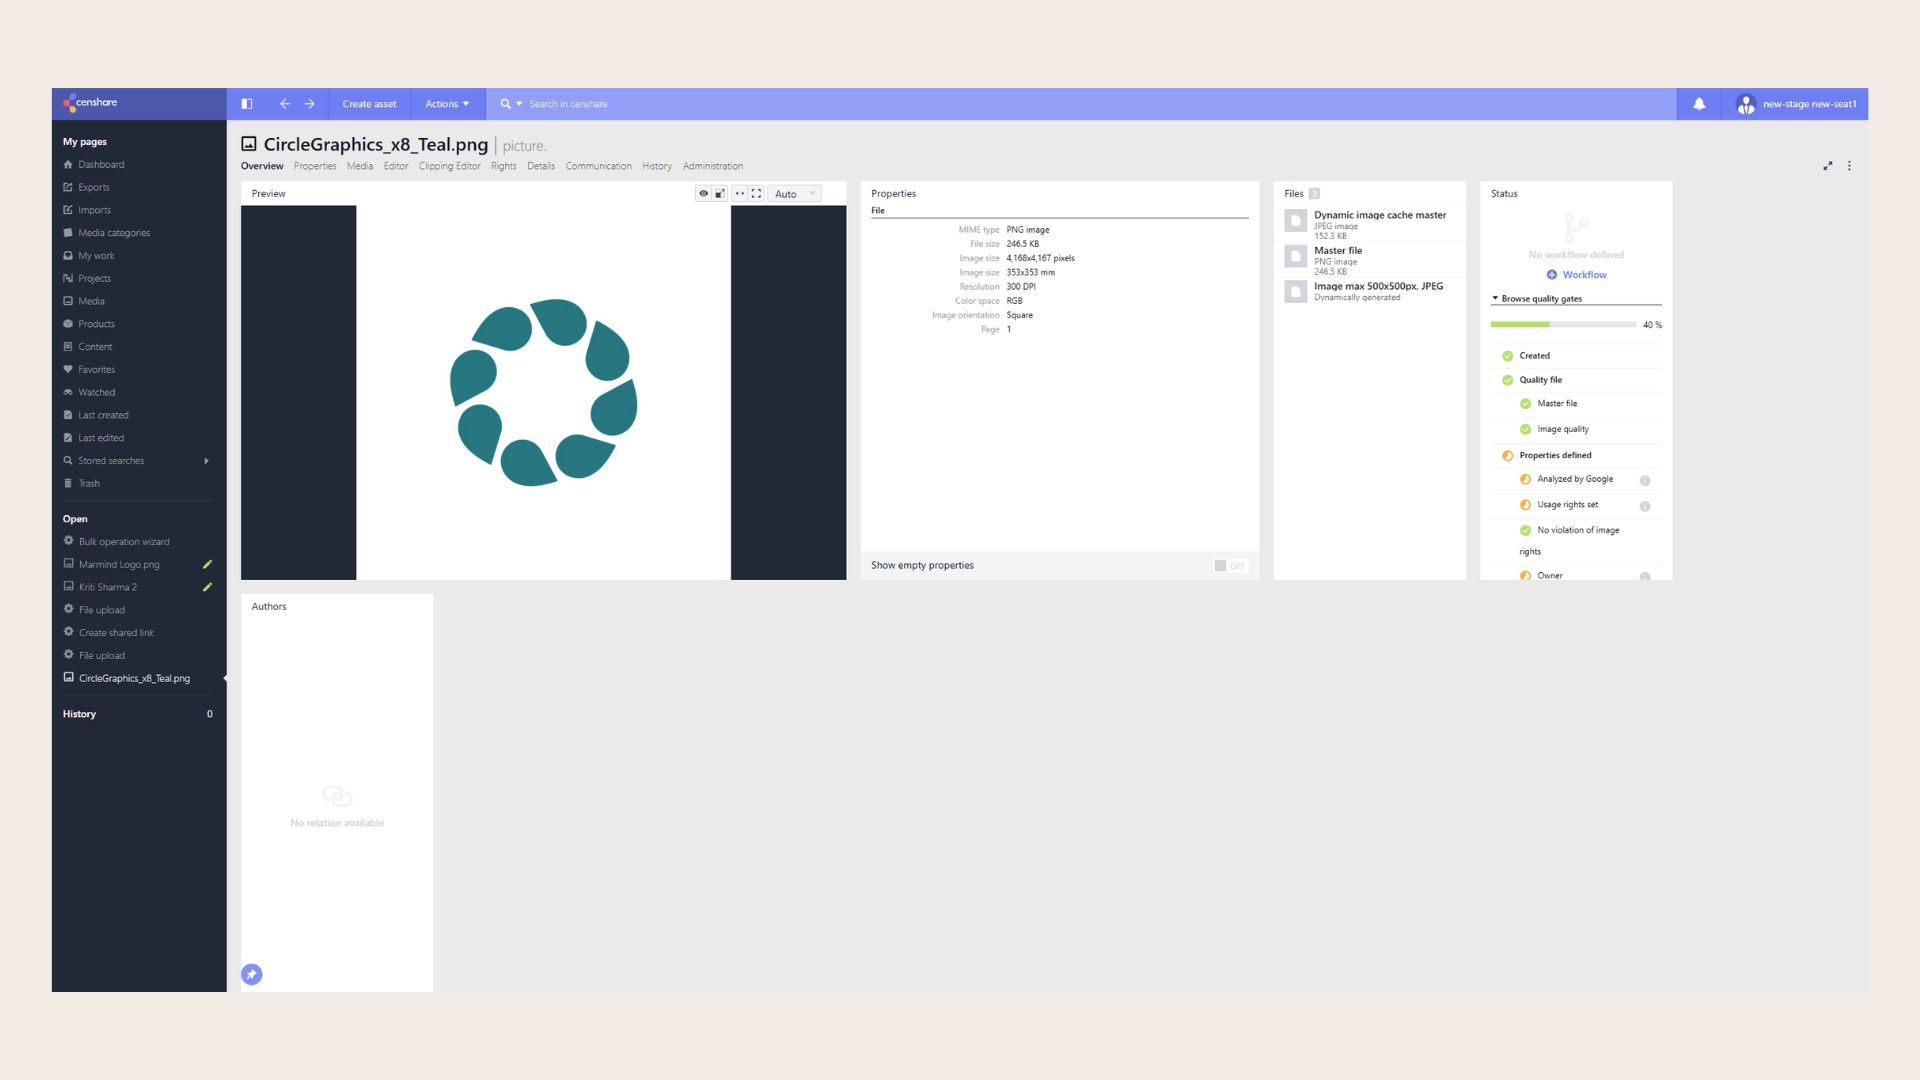
Any changes you make in Censhare will automatically be synced to Marmind and vice versa.
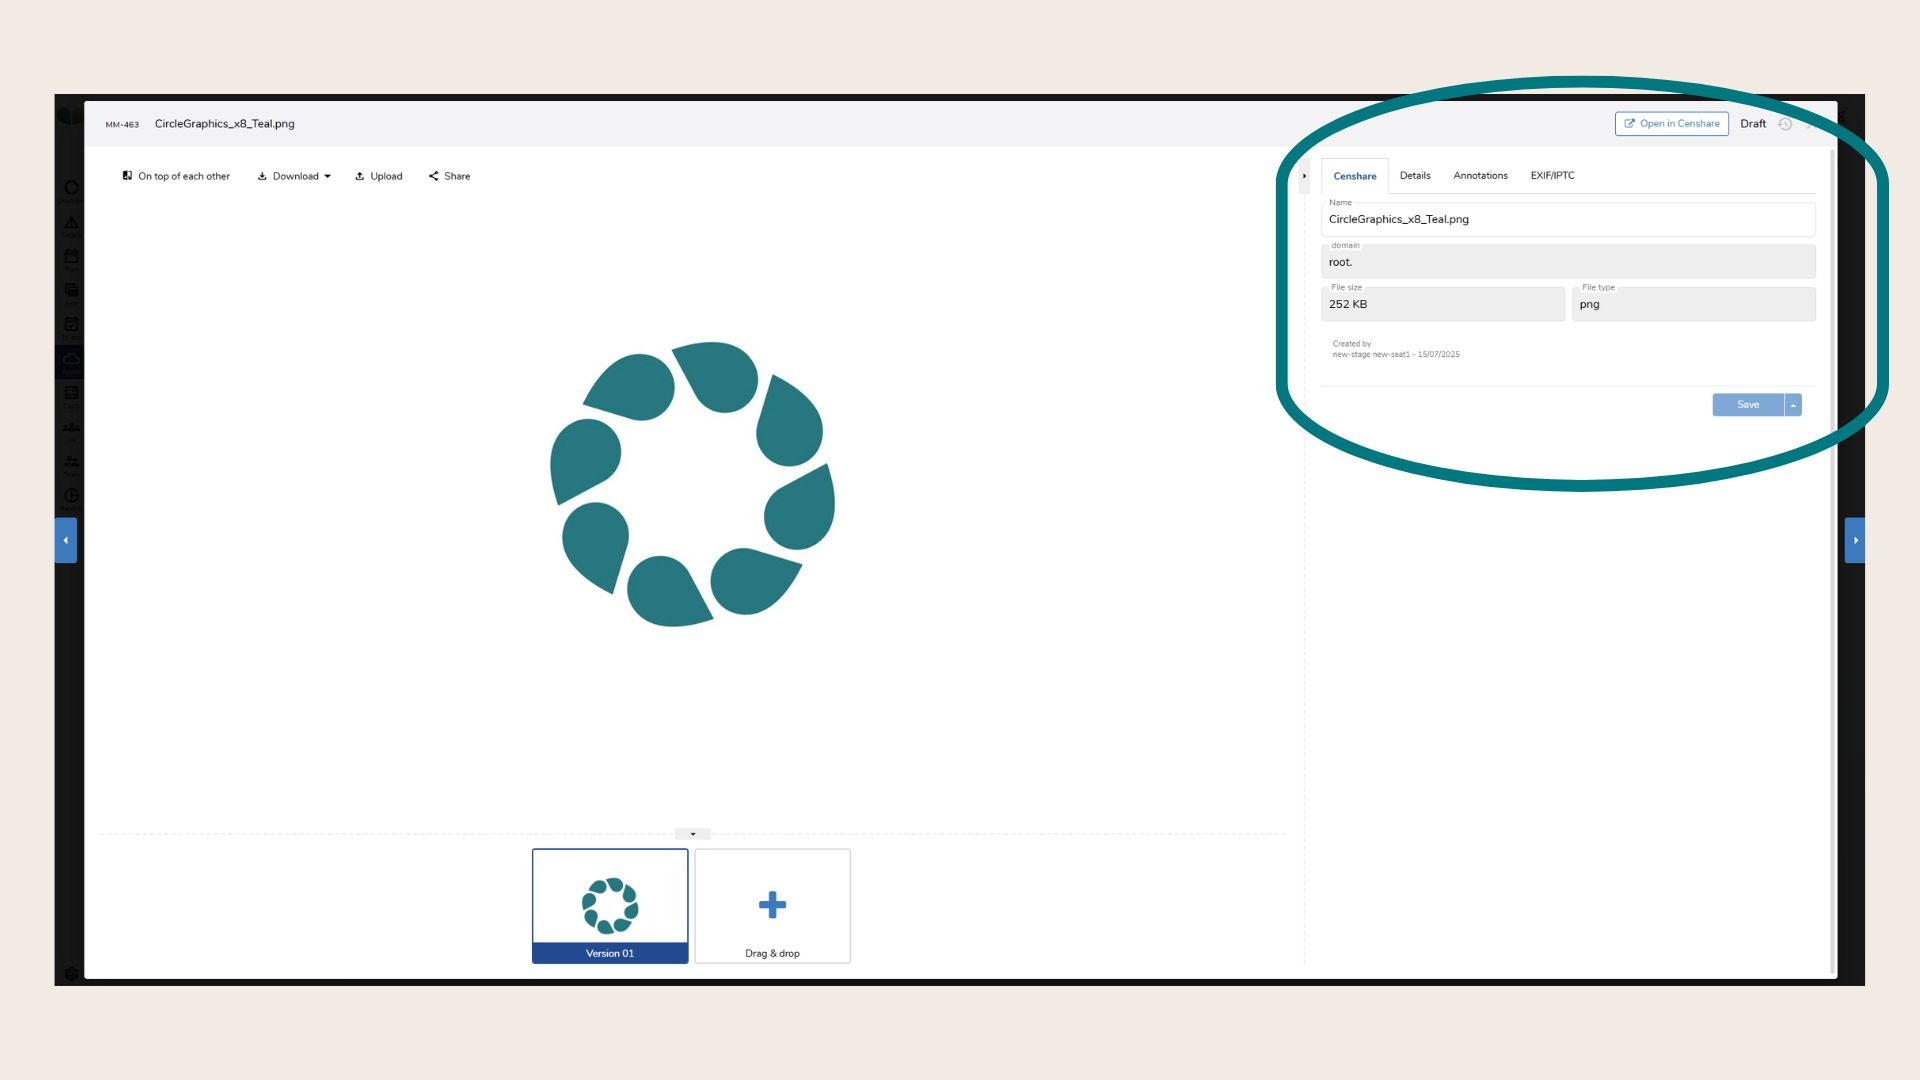
Step 3: Viewing Asset Details
Click on any asset to open the asset details dialog. The dialog contains two tabs:
-
Details tab: shows Marmind-side information: asset usage within Marmind (all places where the same Censhare asset is referenced), workflow actions, and Marmind metadata.
-
Censhare tab: shows the following fields synced with Censhare:
-
Asset name (editable)
-
Relation (editable) - to be added soon
-
Domain (read-only)
-
File size (read-only)
-
File type (read-only)
-
Created by (read-only)
-
Creation date (read-only)
-
Custom metadata fields mapped to Censhare (editable or read-only depending on configuration)
-
The latest asset version is loaded immediately. Previous versions are retrieved asynchronously.
Step 4: Deleting an Asset
When you delete an asset in Marmind:
-
The asset's reference to its parent tree object is removed in Marmind.
-
You will see the message: "Asset reference to [parent] has been removed. To delete the asset completely, please do so in Censhare."
-
The asset itself remains in Censhare. It is not deleted unless you explicitly delete it there.
When an asset is deleted in Censhare:
-
All references between this asset and any parent tree objects it was attached to are removed in both Marmind and Censhare.
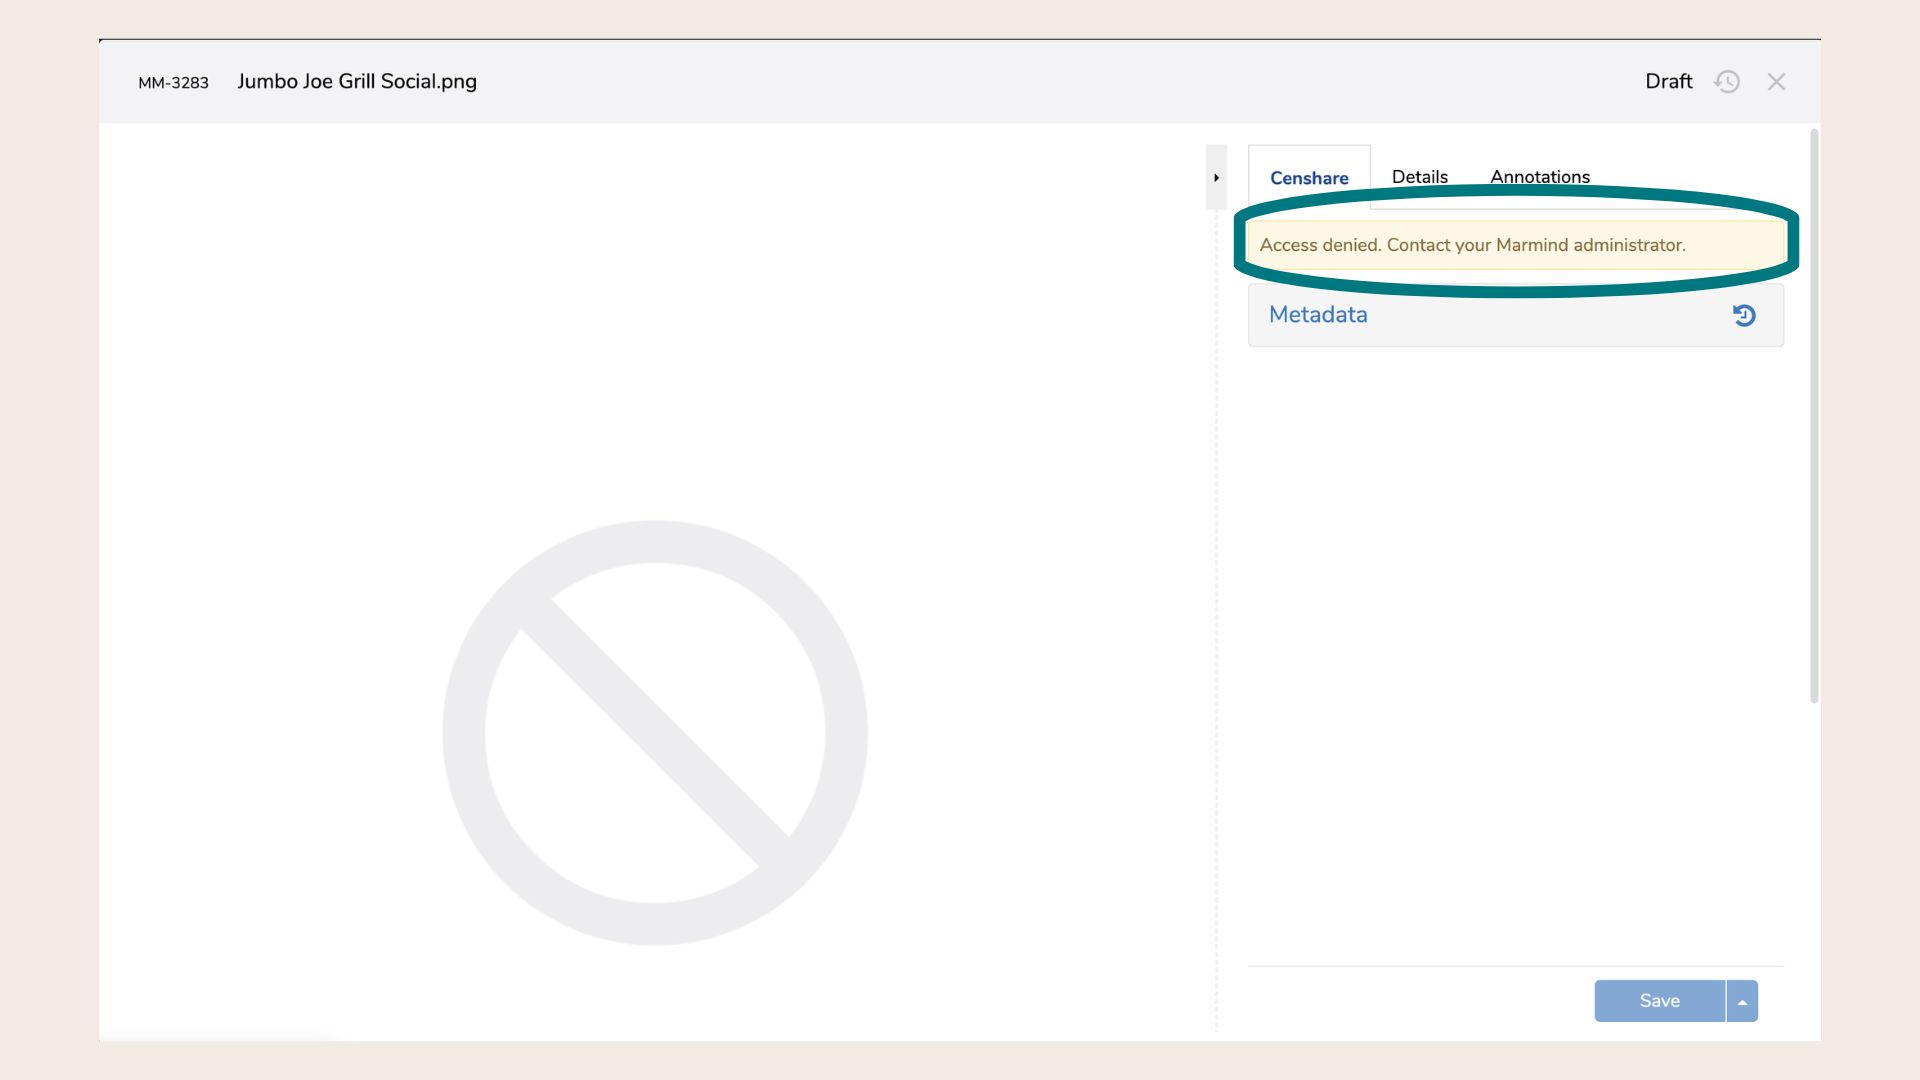
Permissions and Access
If you have Marmind access to an asset but no Censhare permissions for it (or no access to the domain it belongs to), the following applies:
-
All fields in the Censhare tab are cleared.
-
An access denied message is displayed in the tab: "Access denied. Contact your MARMIND administrator."
-
The Open in Censhare action is hidden.
-
The blocked placeholder image is shown instead of the asset preview.
For Administrators
How the asset reference model works
Marmind does not store asset binaries. Every asset in Marmind is a reference to a Censhare asset, identified by the Censhare asset ID. A single Censhare asset can be referenced from multiple places in Marmind. Metadata changes affect all references.
The following metadata is stored in both systems:
|
Field |
Notes |
|---|---|
|
Asset name |
Editable in both systems (bidirectional sync) |
|
Relation |
Editable in both systems (bidirectional sync) |
|
Domain |
Read-only in Marmind. Editable in Censhare. |
|
File size |
Read-only |
|
File type |
Read-only |
|
Creator |
Read-only |
|
Creation date |
Read-only |
|
Censhare asset ID (BinaryDataReference) |
Internal reference; not displayed in the UI |
Metadata synchronization
Metadata sync between Marmind and Censhare operates as follows:
-
Media asset metadata (custom fields): Bidirectional sync. Changes made in either system are propagated to the other.
-
Tree object metadata: One-directional sync, Marmind → Censhare only.
-
Look-up value lists (enumerations): Censhare is the source of truth. Value lists are populated from Censhare into Marmind.
Supported field type mappings:
|
Marmind field type |
Censhare field type |
|---|---|
|
Boolean |
Boolean |
|
DateTime |
Timestamp |
|
Text |
String |
|
Text Area |
String |
|
Number (integer) |
Integer |
|
Number (double) |
Double |
|
Look-up (single select) |
Enumeration |
|
Look-up (multi select) |
Enumeration |
Mapping between Marmind and Censhare fields is 1:1. Combining two Censhare fields into one Marmind field is not supported. Mapping to asset references, keywords, categories, or taxonomies in Censhare is not supported.
Configuring custom panels and metadata sync
Custom panels allow you to display and sync additional metadata fields on Marmind assets and tree objects. This is a prerequisite for metadata synchronization with Censhare.
Step 1: Create custom fields
-
Navigate to Administration → Custom and standard panels → Custom fields.
-
Click Add New Custom Field and provide:
-
Technical name
-
Display name
-
Input type
-
External reference — this maps the field to its Censhare counterpart. Examples:
-
String field:
<field_name.field_type>e.g.marmind_demo.text -
Enum field:
$items = WebRequest("/schema/any_media/cs-description/marmind_demo.enum2") $items.values.Select(obj(Name: name, Key: value.value))
-
-
-
Click Save.
Step 2: Create custom groups
-
Navigate to Custom groups.
-
Click Add New Custom Group and provide: technical name, display name, layout (number of columns), and the fields to include.
-
Click Save.
Step 3: Create custom panels
-
Navigate to Custom panels.
-
Click Add New Custom Panel and provide: technical name, display name, and the groups to include.
-
Click Save.
Step 4: Create an External Content Category
This links a custom panel to a specific Marmind object type + Censhare asset type combination, and controls where the panel appears.
-
Navigate to Administration → Categories and tags → External content categories.
-
Click Add and provide: name, Marmind object type, Censhare asset type.
-
Click Save.
Step 5: Assign custom panels to the External Content Category
-
In the External content categories table, click the newly created category.
-
Click Add custom panels.
-
Select the panels to assign. Check Expand if you want them shown expanded in the UI.
-
Click Save.
DAM capabilities — controlling feature visibility
Certain features available in Marmind's native MAM are not applicable when Censhare is the underlying DAM. The integration uses a DamCapabilities configuration to control the visibility of these features. The following actions are hidden or disabled when the Censhare integration is active:
-
Share assets (via public link) — not supported in initial release
-
Bulk asset download
-
Add external link
-
Reference existing asset (replaced by "Select assets from Censhare")
-
Reserve asset
❓ FAQs