📄 Summary: What You’ll Learn in This Article
This article provides a step-by-step guide on navigating the Workflow Module in Marmind, covering its location, key workflow elements, and user interface.
-
Locating the Workflow Module
-
Core Workflow Elements
-
Commands and Steps
🧑🤝🧑 Who Should Read This?
This article is most useful for:
-
Marketing Professionals, Marketing Operations Managers, Business leaders who are interested in Marmind’s features
-
New Marmind Users
✔️ Prerequisites: What Should You Know Before Getting Started?
Level: Intermediate
Access required: You need Super-Admin access rights to benefit from this knowledge.
-
Basic knowledge about workflow components is required.
Locating the Workflow Designer
-
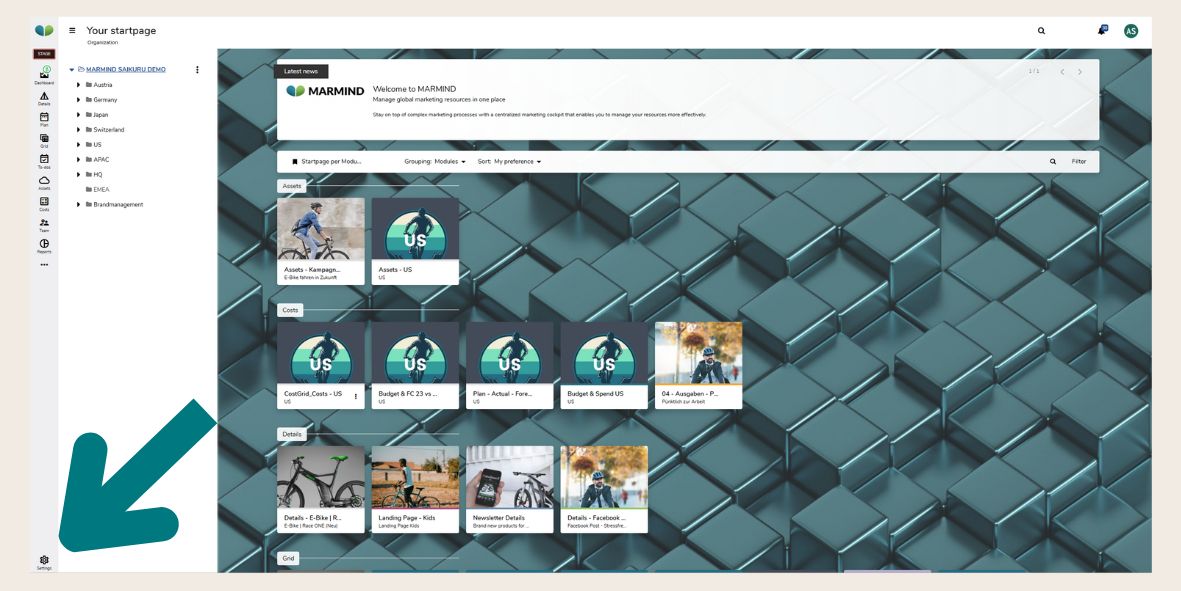
The Workflow designer can be accessed through the settings in Marmind.
The Workflow module is only visible to you if you have Super-Admin rights.
Log into Marmind and click on the Settings here:
-
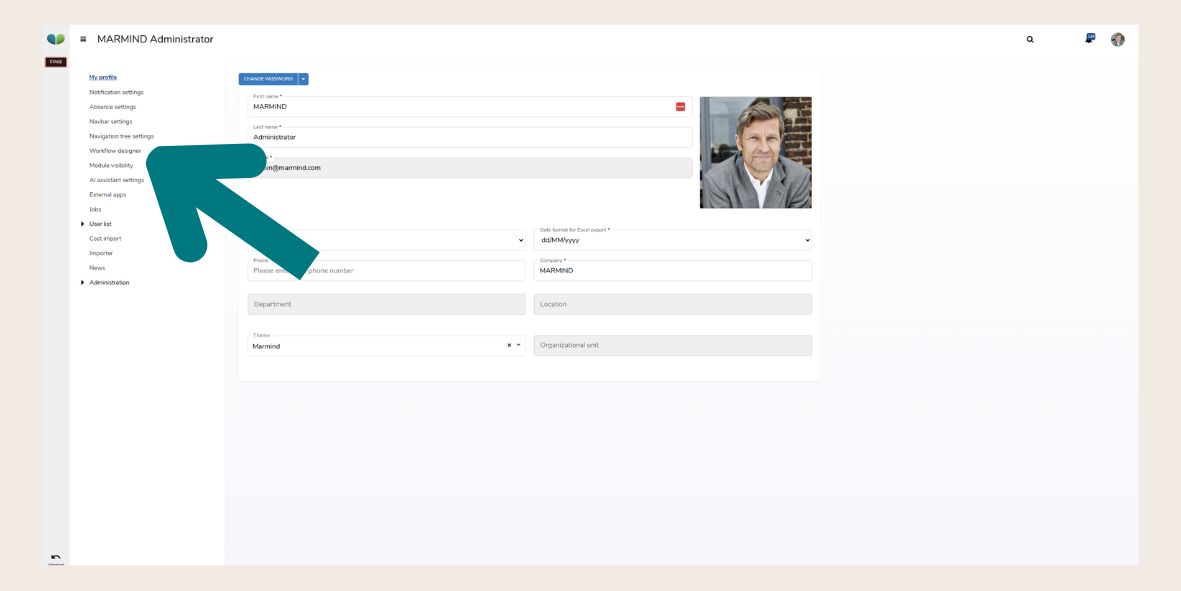
Look for the “Workflow Designer” module and click on it to open:
There is only one workflow designer per system. However, if you need different decision paths for different root folders, this can be done directly in the parent workflow.
Core Workflow Elements
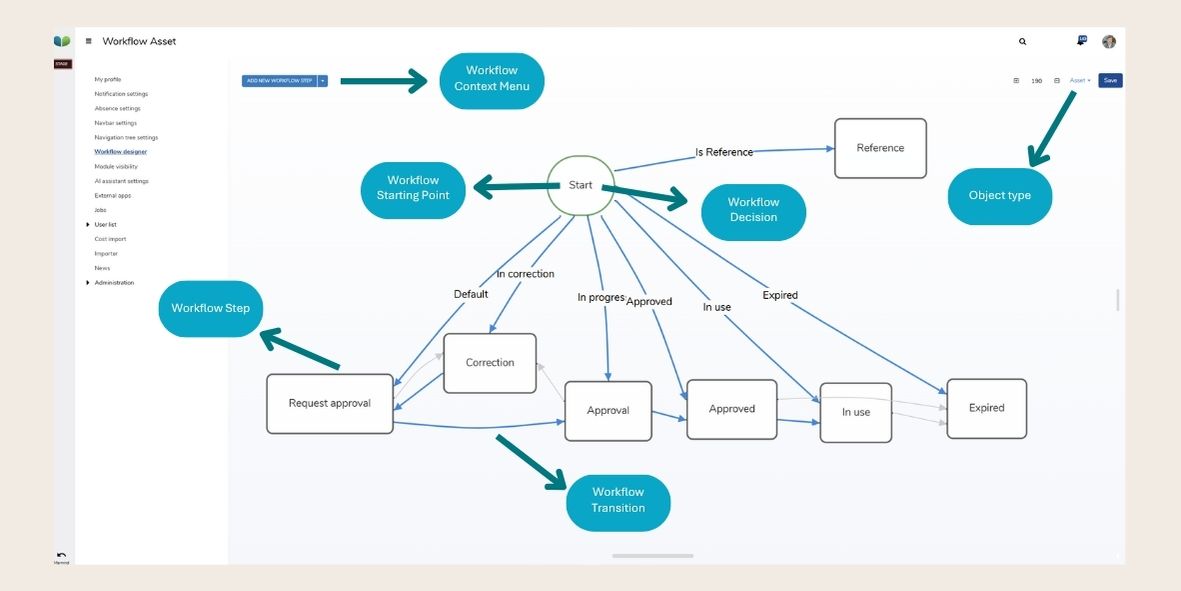
Workflows in Marmind consist of several key components that define their structure and functionality. Each element plays a specific role in ensuring that tasks progress smoothly, from initiation to completion. Below are the core elements that make up a workflow:
-
Workflow Context Menu – A menu in the Workflow Designer that allows users to add, edit, import, or export workflows, as well as define new workflow steps or decisions.
-
Object Type – The name of a workflow, which identifies it in the system. Users can switch between workflows using a dropdown in the Workflow Designer.
-
Workflow Starting Point – The initial trigger of a workflow, marking where the process begins. This must be defined to ensure proper execution.
A workflow always has to have a starting point. Otherwise, there is no result.
-
Workflow Decision – A conditional logic element that directs the workflow based on specific rules (e.g., “Is this asset a reference?”).
-
Workflow Step – An actionable stage within the workflow where users perform tasks, such as requesting approval or making corrections.
-
Workflow Transition – The connection between workflow steps, determining how the process moves from one step to another based on user actions or conditions.
Commands and Steps
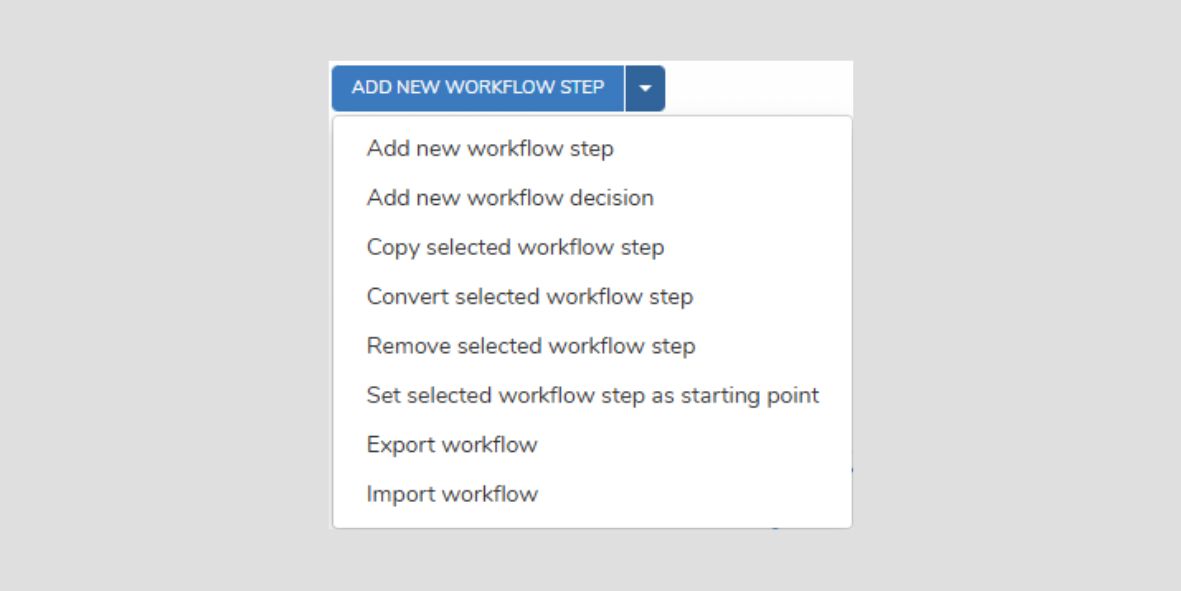
Starting from an existing Workflow, you can edit the different steps, decisions and transitions according to your needs. To add a new workflow step, select the Workflow Context Menu.
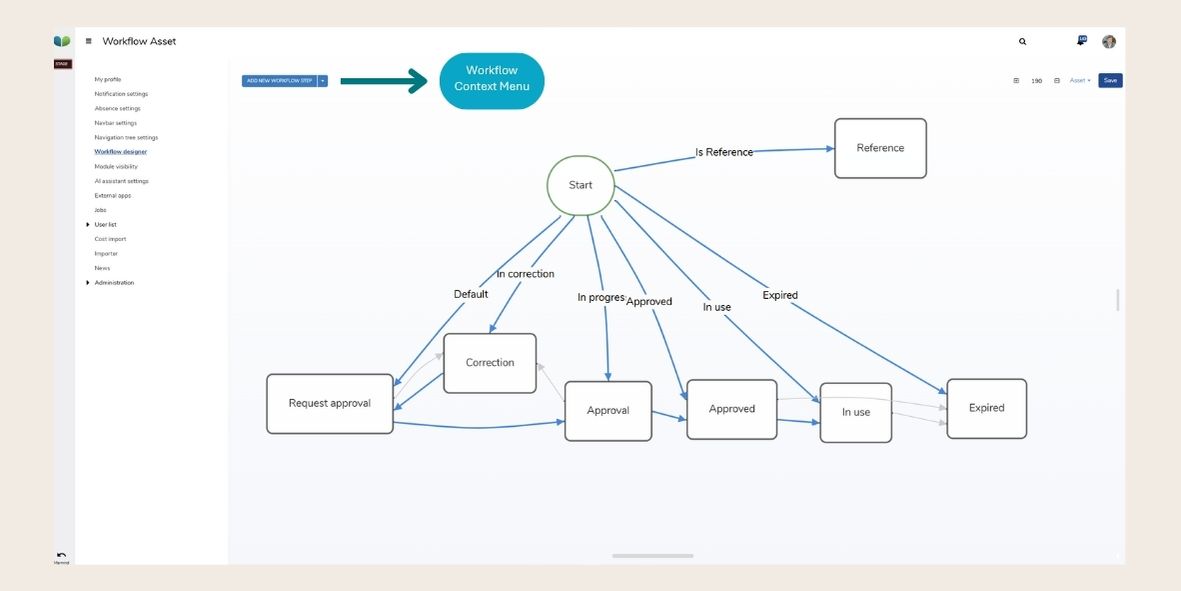
In the Workflow Context Menu, you can select from several different options to modify your workflow:
If you want to modify a specific step, click on the step. A window will open on the right hand side and give you several options on triggering the next action:
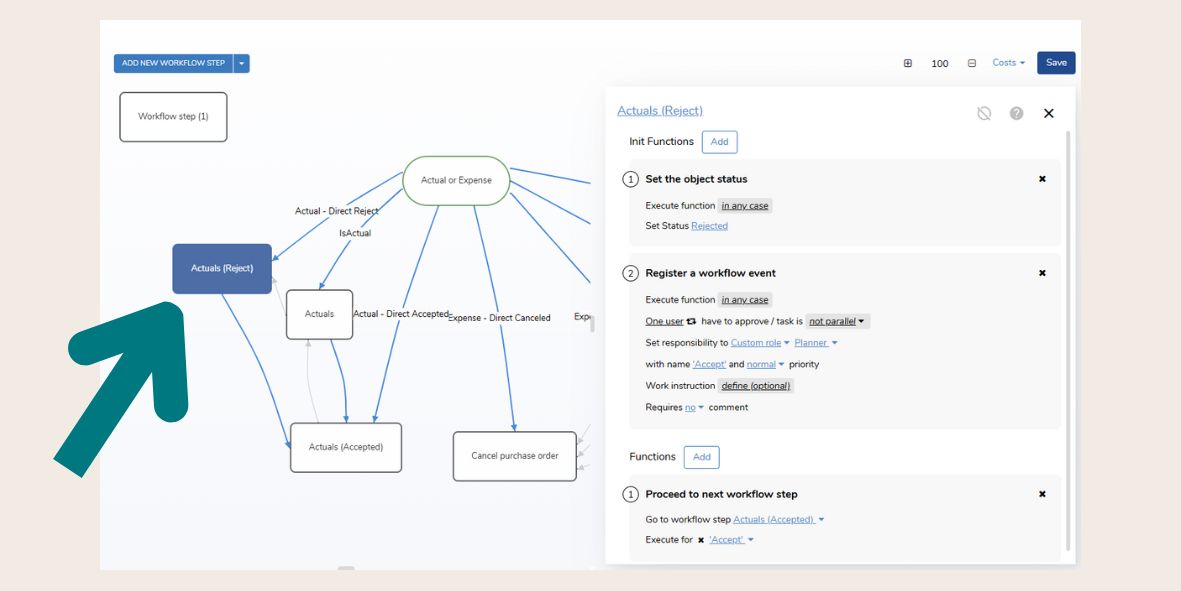
If you need more information on specific actions, click on the question mark at the top of the window.
❓ FAQs