Summary: What You’ll Learn in This Article
This article details how to execute and monitor workflows in Marmind. It covers workflow tracking, managing approvals, and troubleshooting workflow issues.
-
Roles and Rights
-
Running a Workflow
-
Tracking Workflow Progress
-
Ensuring Transparency and Traceability
🧑🤝🧑 Who Should Read This?
This article is most useful for:
-
Marmind Users with Super-Admin rights
-
Super-Admins configuring workflow processes
✔️ Prerequisites: What Should You Know Before Getting Started?
Level: Intermediate
Access required: You need Super-Admin access rights to benefit from this knowledge.
-
Basic knowledge about workflow components is required.
Here’s a step-by-step guide on how to set up and manage a workflow. Workflows are highly individual to your needs so in order to make this more tangible, we are using an asset approval process as an example.
Roles and Rights
MARMIND uses a top-down permission inheritance system, meaning that permissions assigned at a higher level automatically apply to all levels below.
For example, if a user is assigned the Approver role at the Workspace level, they will have approval rights for all sub-levels within that workspace.
Since permissions cascade down, carefully consider who should have which roles at each level to ensure proper access control and workflow management.
-
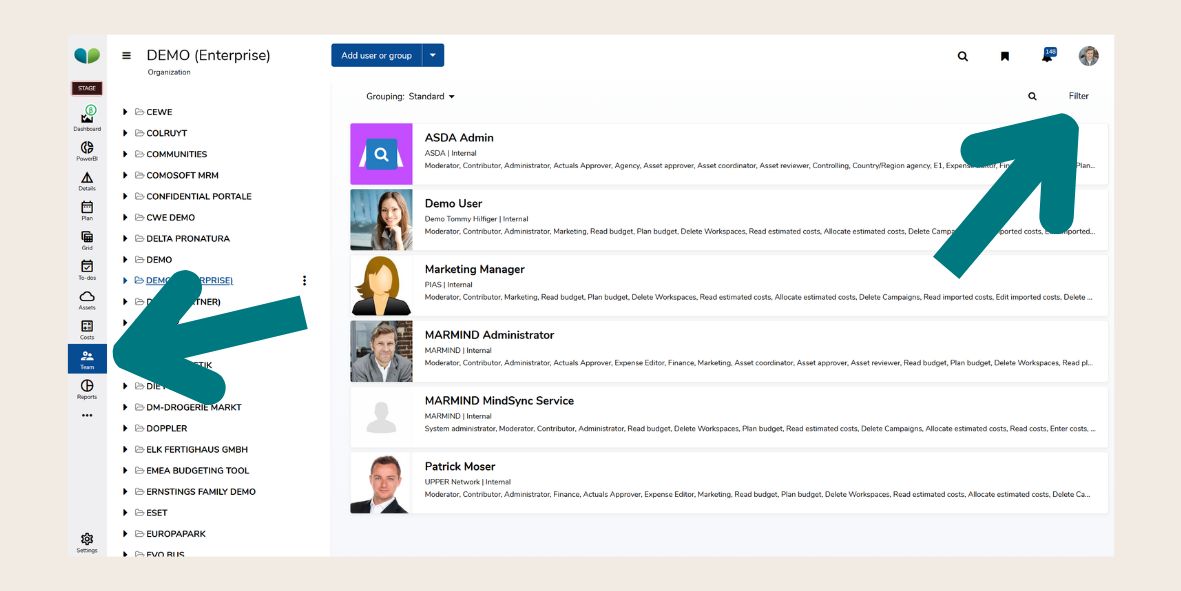
Step 1: Check permissions by clicking “Team” and the related workspace.
-
Step 2: Filter the roles and rights to check on any specific roles regarding your specific workflow.
-
For example: Find the Asset Approver role and make sure that only those people are given this permission, who are eligible to approve assets.
-
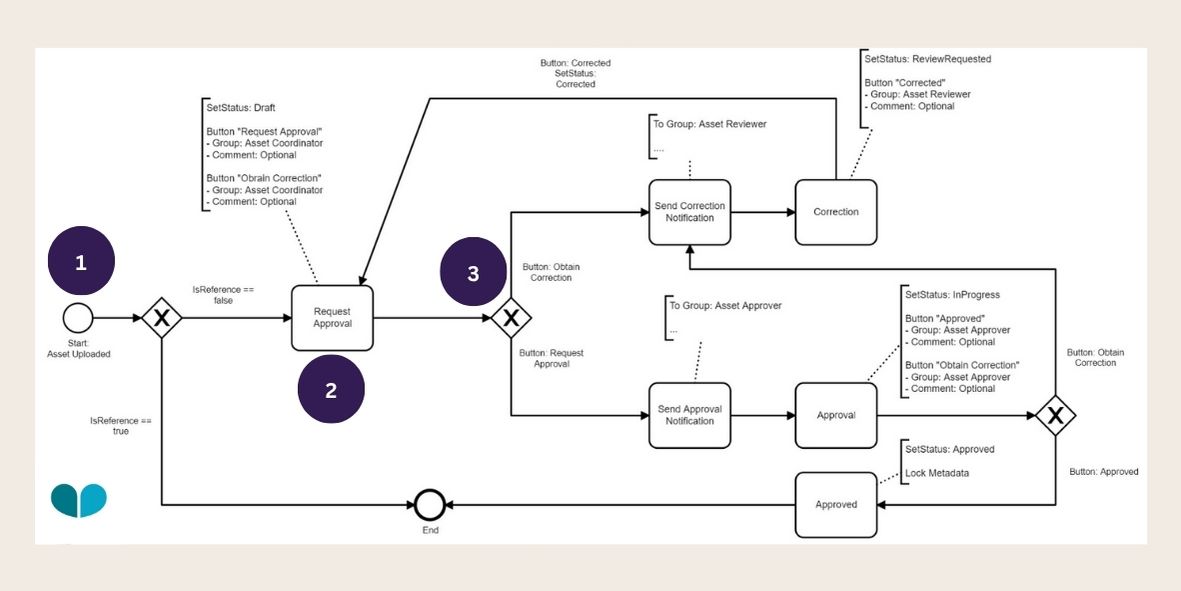
Running a Workflow
-
Step 1: Initiate the workflow with a starting action.
-
For example: Upload an asset to trigger the workflow.
-
-
Step 2: The starting action moves to the first stage of the workflow.
-
For example: The asset will enter the first step (e.g., Draft or Approval Pending).
-
-
Step 3: Assigned users receive notifications and must take action.
-
For example: An asset approver receives a notification to approve the asset.
-
Tracking Workflow Progress
-
Step 1: Use the Workflow Designer to monitor active workflows.
-
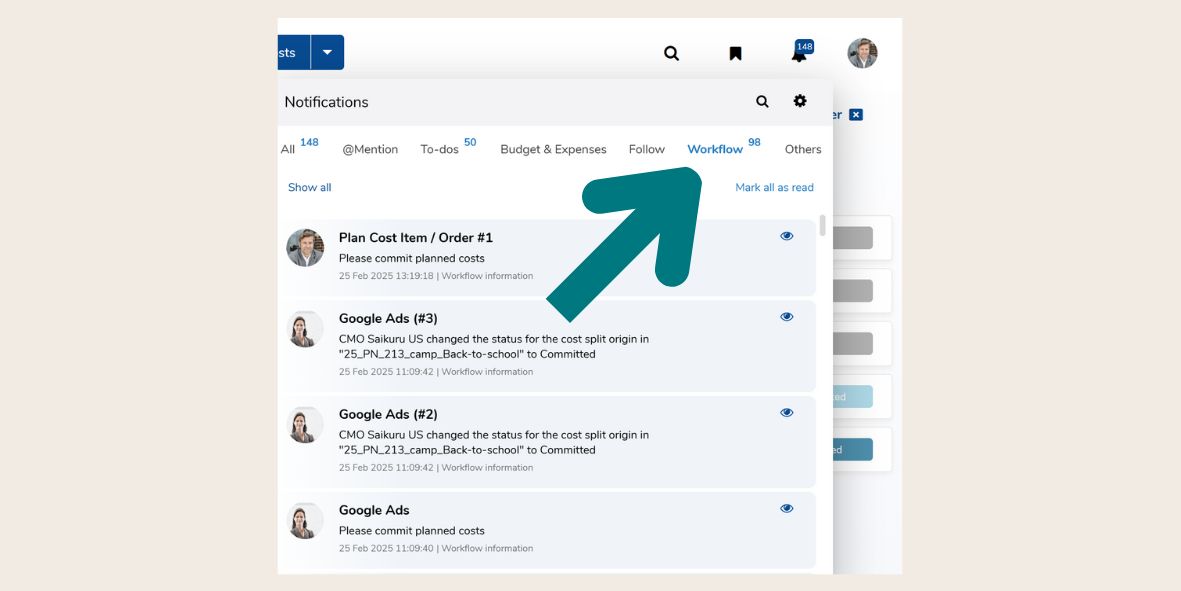
Step 2: Check the Notification Center for pending approvals. You can find this in the top right corner.

-
Step 3: A new window will open with any new notifications. You can click on “Workflow” to filter any pending approvals.
-
For example: An asset approver receives a notification to approve the asset and clicks “Approve” or “Request Correction” to move the workflow forward.
-
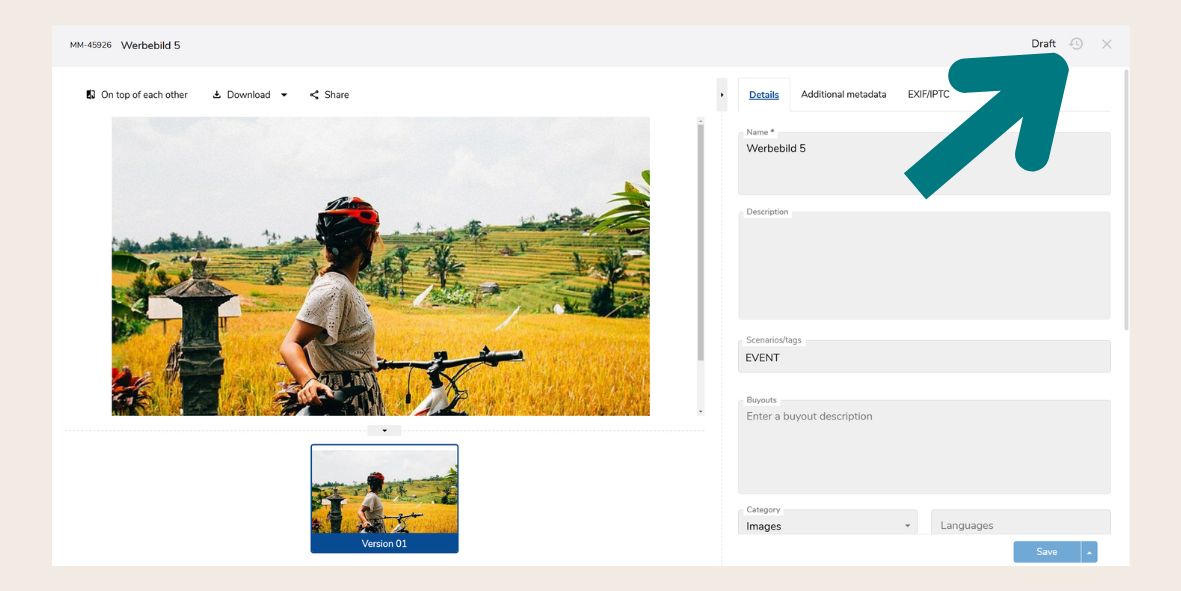
Ensuring Transparency and Traceability
The workflow history provides a detailed log of all actions performed within a workflow, including information on who executed each action and the corresponding timestamps.
The workflow history can be found here:
The Team Overview Report serves as a valuable tool for monitoring user permissions and keeping track of outstanding tasks, ensuring that all responsibilities are properly assigned and managed.
If a workflow is not functioning as expected, the first step in troubleshooting should be to check the workflow history, as they can provide insights into any errors or misconfigurations.